|

Bromcom Finance: How do I process Non-Invoiced Income

You have two options on how you record Non-Invoiced income as follows:

Navigate to Modules > Finance > Accounts Receivable

(Note: you will need to setup a receipt book and paying in book if not already done so for accounts receivable via Modules> Finance> Maintenance > Books)

  1. To record a receipt, click the “non-inv receipt” button, please complete all fields ensuring you select cash or cheque only and tick centrally paid check box and click save.

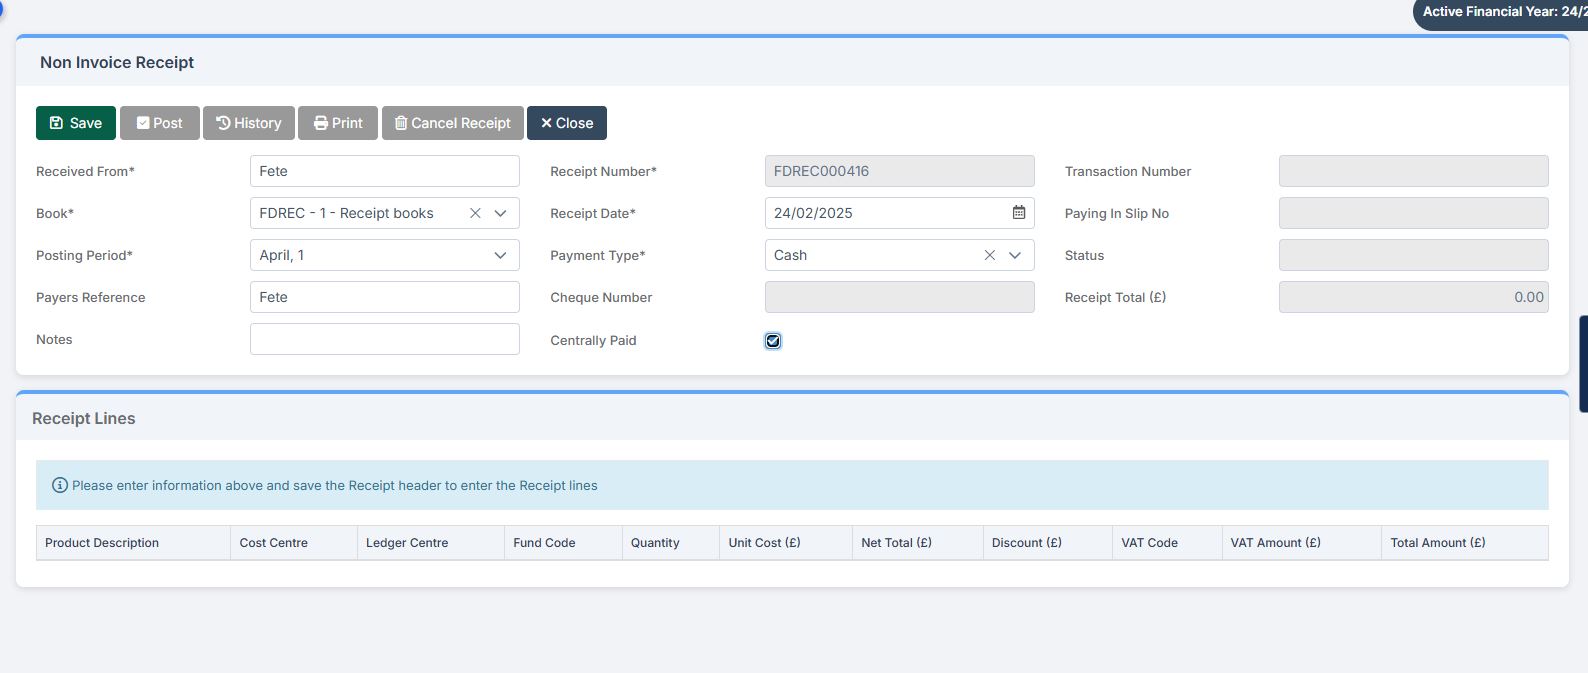
2)  Add your receipt lines as in example screen shots below

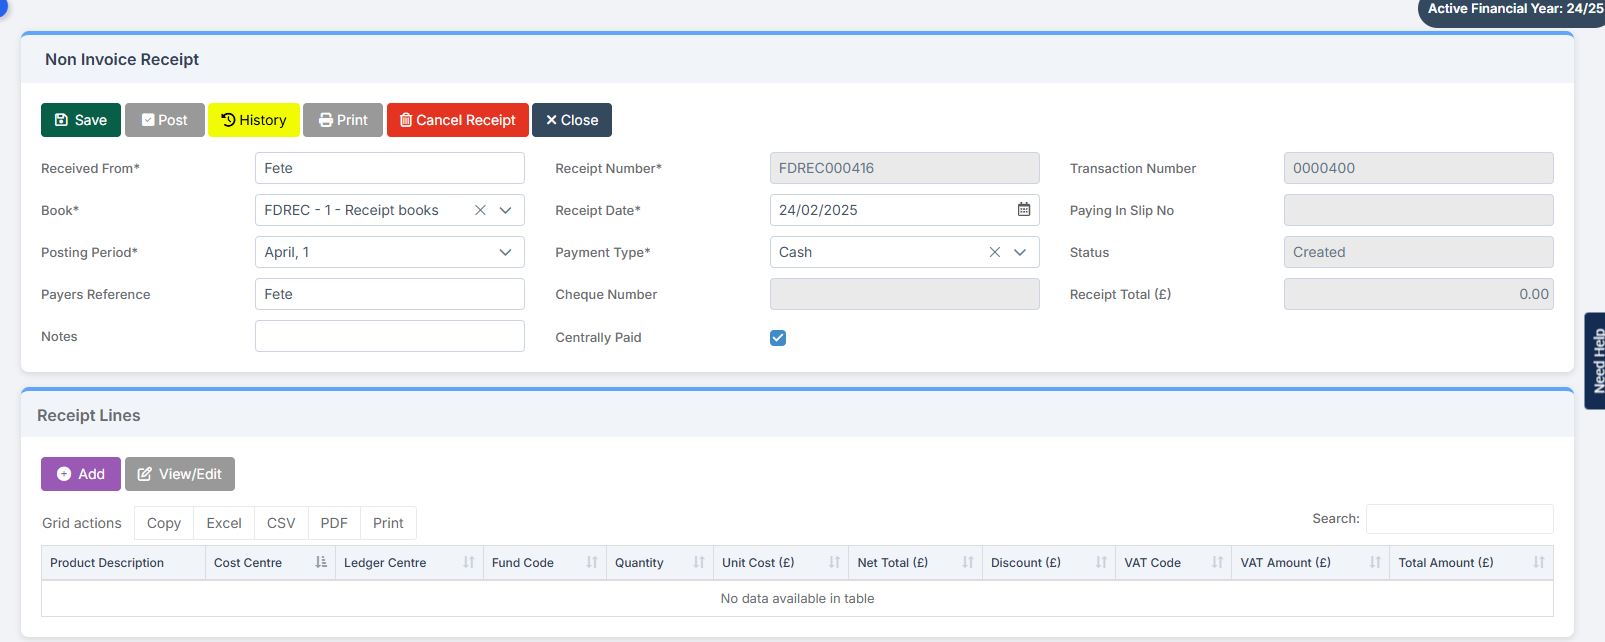
3) Once you have added your receipt details, please click save & print or save & next.

4) Please Click  the purple add button to add a paying in slip, select the book, pay from, paid in date, posting period and tick centrally paid.

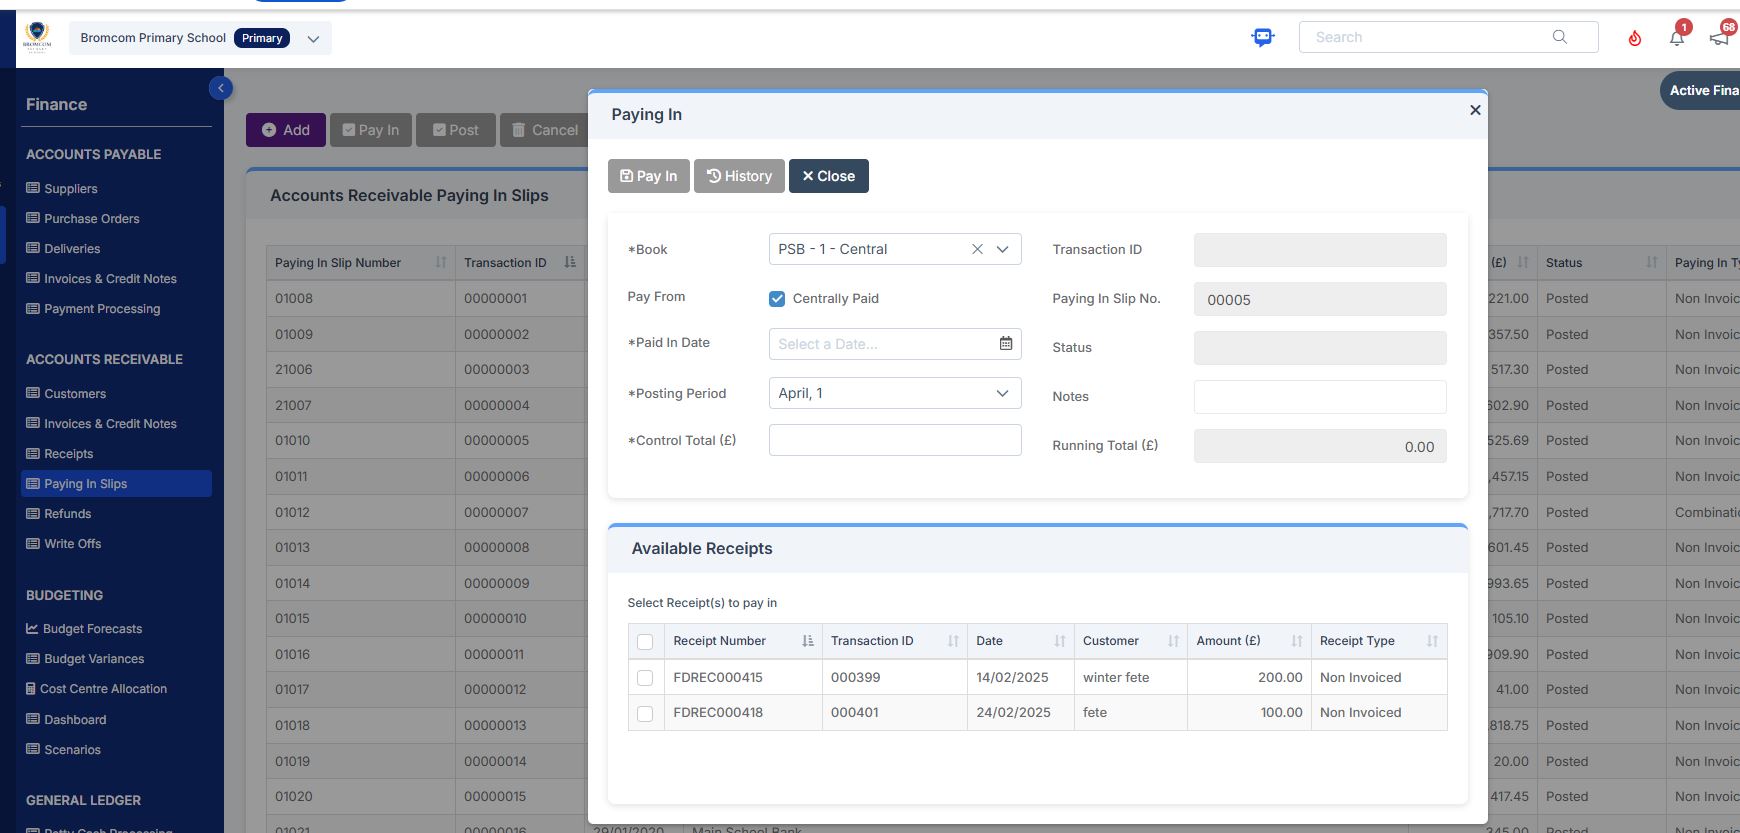
5)  Tick the receipt lines applicable  and click pay in and say yes to authorise and print

6) Now that you have recorded the receipt and paying in slip you will need to navigate to  Modules> Finance > General ledger> Central Manual reconciliation> switch toggle button from  Accounts Payable to Accounts receivable as in this screen shot below and manually reconcile the relevant income recorded in the above steps.

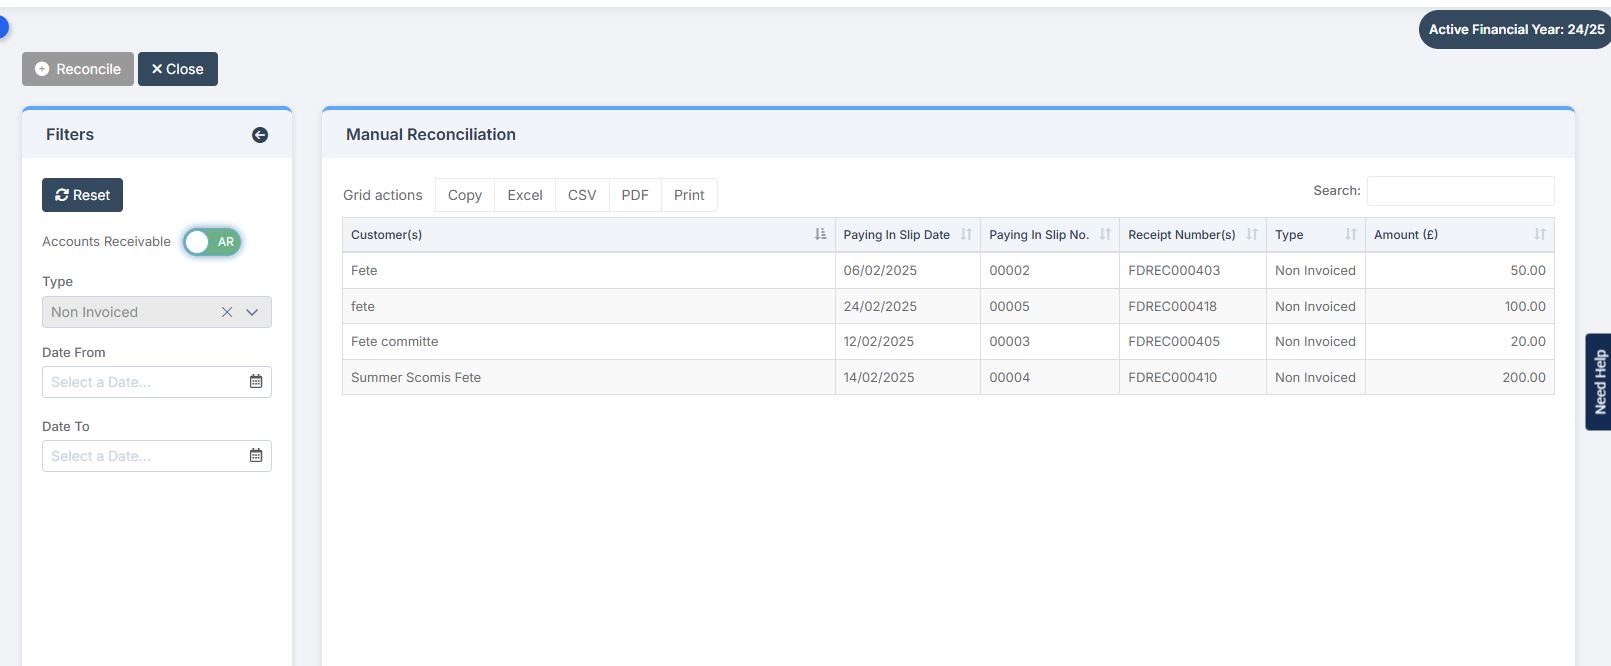
7) When your automatic reconciliation comes down, you will need to delete the line as you will have already reconciled in step 6


For more information on recording non-invoiced income , please see Non Invoiced income receipt guide


The alternative option is you could record via Accounts payable

The other option is you can record in accounts payable  via  Modules> Finance> Routines> Central payment and receipt

  1. Import file and identify income
  2. Record a Central Receipt for the Money received Modules Finance> Central payment and receipts
  3. Delete item from auto rec


How useful was this article?

Click on a star to rate it!

Average rating / 5. Vote count:

No votes so far! Be the first to rate this post.

Similar Posts

  • Bromcom: Unable to change staff absence end times

    Staff List Page>Choose Staff>Actions>Add Absence (and creating absence via Staff Profile page) How to Record Staff Absence – Bromcom – Documentation Centre You may find, when entering a Staff Absence, whether you select specific time (eg half day, 3/4 day) the time changes to a default time. In order to rectify this, you need to…

  • MCAS – Dinney money widget is missing to add payments

    Parents are unable to see the “Dinner money” widget to add payments for their children. Please check the following: Please ensure online payments is enabled via Config> MCAS> Online payments – Please also see How do I enable Bromcom Online payments in MCAS – SCHOOLS – Frequently Asked Questions Ensure the Dinner settings are setup …

  • BROMCOM:Shared Staff in a tutor group

    If you have more than one staff member with scheduled timetabled registers e.g Mr Smith is timetabled for Mon-Wed and Mrs Brown is scheduled Thur- Fri then you might want to remove tick box ten from the Daily Maintenance Settings. The Daily Maintenance Settings are a group of processes that are performed automatically on a…

  • Configuring Exam Timetables and Results in MyChildAtSchool

    It’s possible to add both exam timetables and results to MyChildAtSchool (MCAS), the following KB will detail how to activate the areas in MCAS, and how to configure them. Navigating to the Configuration Area To begin with, browse to Config>MyChildAtSchool>Exam.   Activating the Modules Both the results and timetables can be activated separately, this can…

  • Bromcom: Exam Results import errors

    When importing your results files into Bromcom it is possible that you may experience one of two errors. The first error as shown above is “Exam Code not in Candidate entered Exams”. This means that Bromcom cannot find an entry that corresponds with the results Exam Code. To resolve this error move the radio button…

  • Bromcom: Taking PM marks in different periods

    Question: Is it possible to have the PM mark taken at different periods through the week? I.E. P5 the majority of the week but P4 on a Wednesday Answer: This can be setup within Config > Attendance > Registration Update Parameters. If you wanted a different period for each day this would have to be…