Third Party Application integration with Bromcom
When looking to integrate a third party application, it’s best to liaise with the third party for more detailed instructions. The purpose of this guide is to explain how a new User Account can be created to give Third Party Supplier’s access to data in your MIS system through Bromcom’s API interface, which is required for all third party applications to function. This includes the following;
- How to Add a New User Account with Third Party Permissions
- Set up Write Back Permissions
- Checking Data Processing Consent
URLs
The standard URL for Read Only access is below.
- https://cloudmis.bromcom.com/Nucleus/WebServices/ThirdParty/TPReadonlyDataService.asmx
The standard URL for Write access is below.
- https://cloudmis.bromcom.com/Nucleus/WebServices/ThirdParty/TPWriteDataService.asmx
How to Add a New User Account with Third Party Permissions
Log in to Bromcom with a User Account that has access to the Setup module. Typically a school administrator account.
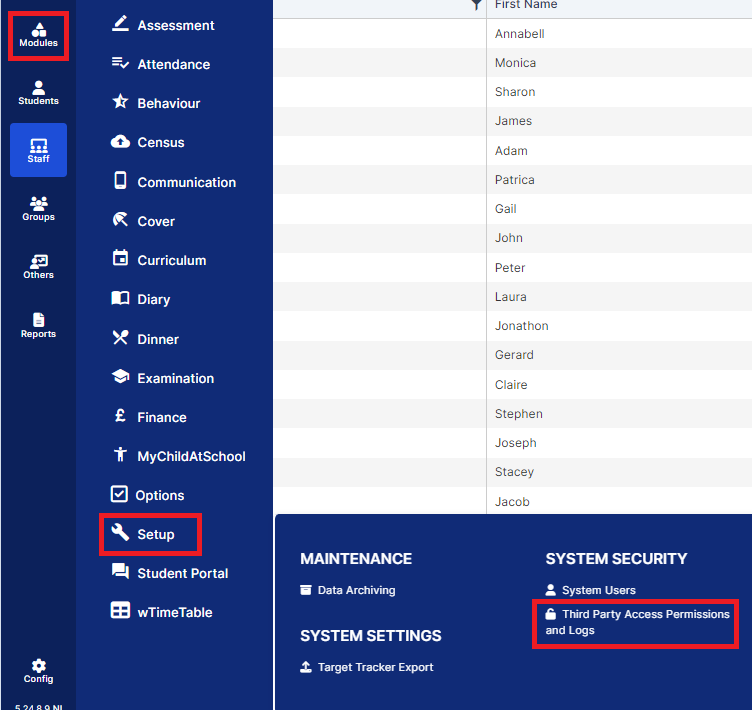
Go to Modules>Setup>System Users.

Click on New to create a new User Account.

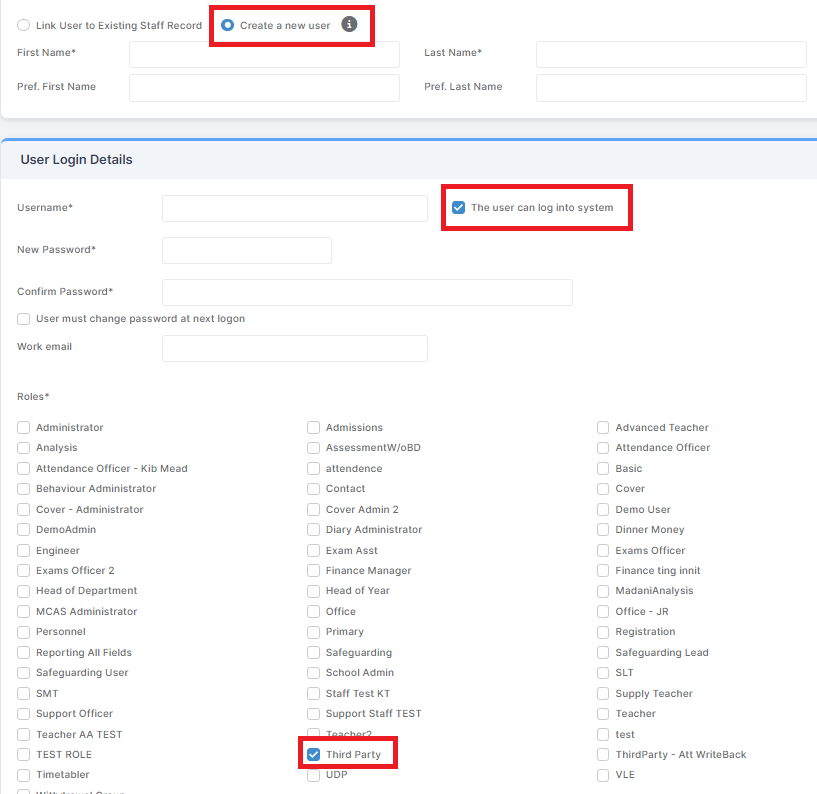
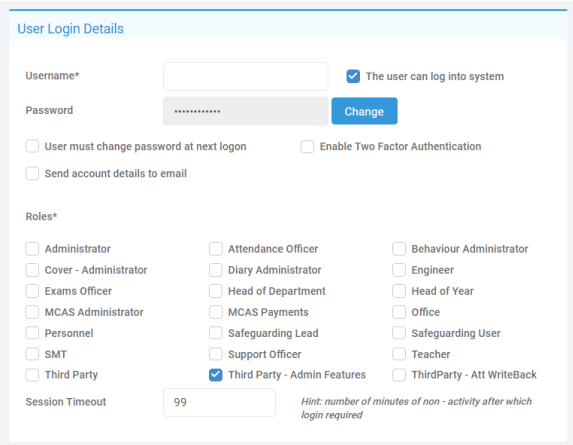
Select the Create a New User radio button and fill in the First Name, Last Name, Username and Password fields.
You should also ensure that the Third Party tick box is checked under Roles.
By default, none of the APIs will be enabled for access to newly created Third Party Accounts.
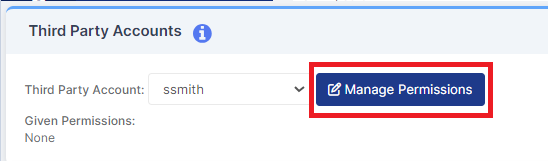
Select the Third Party Supplier’s account in the dropdown to see and manage Permissions to the API entities for that User Account.
Note: The Third Party Supplier should provide you with a list of the API entities they need to access, you will need to enable the specific permissions that they outline. They will be able to provide further assistance regarding this should it be required.
On the same page, you can also view the access logs of this Supplier’s account. Logs are kept for 3 months.
If the Third Party Application is not going to be performing Write Back to the system, please skip to Checking Data Processing Consent.
Set up Write Back permissions
To set up Write Back permissions; we recommend to create a custom Role which only has write-back enabled, please Note that there is already a role for Attendance write-back).
Within the Roles & Permissions page (Config>Setup>Roles and Permissions), create a new Role.

This will take you to the following screen.

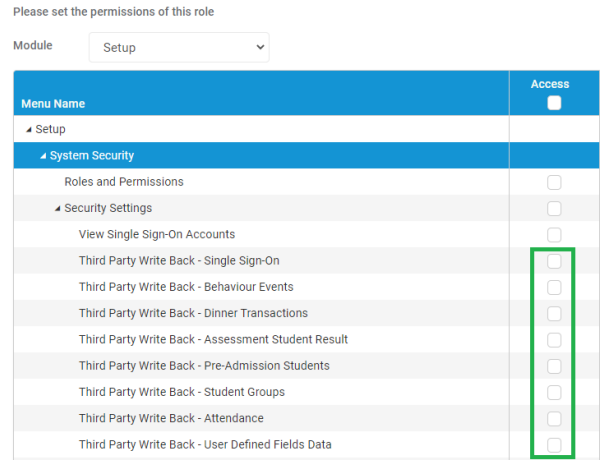
After clicking the New button, the Write Back permissions can be found by selecting the Setup module and expanding out the tree to System Security>Security Settings>Third Party Write Back – xxxxxx.
The Third Party should be able to tell you which APIs they are calling to write-back.
Once the new role has been given a name, description and the appropriate Write Back permissions have been assigned, click Save.
Once this role is saved – the School can assign it to specific users on the System Users page.
Checking Data Processing Consent
At this stage; Third parties should be able to access the APIs; however they may not have access to read all the student or staff records.
This is due to GDPR related settings (Data Processing Consent), these are set either at a School level; or at a Student/Staff level.
To set at an overall School level, browse to the Config>Administration>Administrative Defaults.
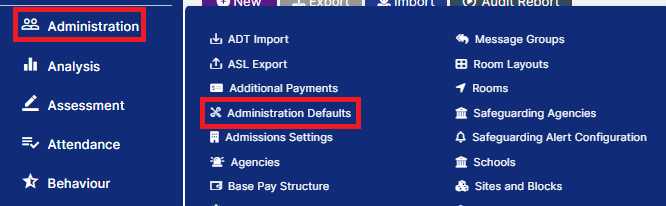
Within Config>Administration>Administration Defaults, there is a drop down box for Lawful basis for data processing with multiple options.
If you pick any option except Consent, then automatically ALL Students and ALL Staff will become accessible via the APIs.
If you pick any option except Consent and click Save; then you have completed the setup.
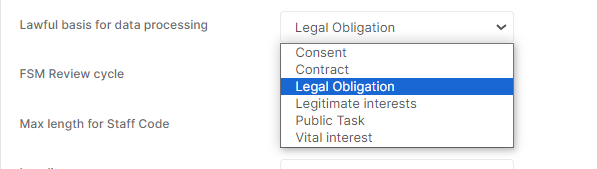
If you pick the option Consent, then you will need to set the Consent for Data Processing at a Student/Staff level.
The Student/Staff Modules can be accessed via the side Menu as normal.
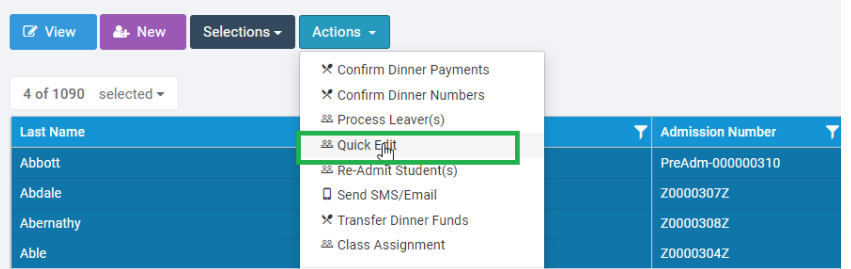
From the Student page you can select some Students, press Actions and select Quick Edit.
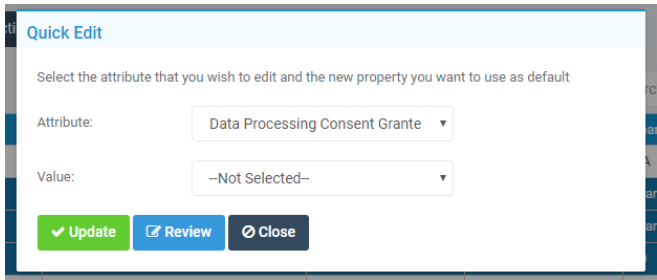
A popup box should appear, allowing you to pick the attribute Data Processing Consent Granted, and select a value of True/False.
At this point you can click the Update button to set the values as needed. (Review will allow you to review the changes before updating them).
When set to True: the selected Students will have their data accessible by Third Parties.
When set to False: the selected Students will NOT have their data accessible by Third Parties.
Reminder: This is only needs to be set when the Lawful Basis for Data process field is set to Consent and applies to ALL third parties.
The same option can be picked for Staff as well, under the Actions>Quick Edit.

The Data Processing Consent granted field can also be set on a person by person basis within the Key Data panel of the Student Record, or the Personal Details panel of the Staff Record.
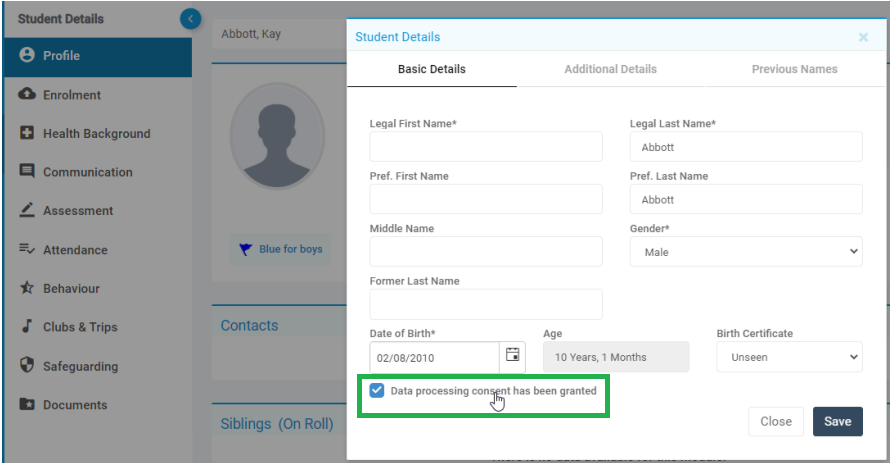 Student Page
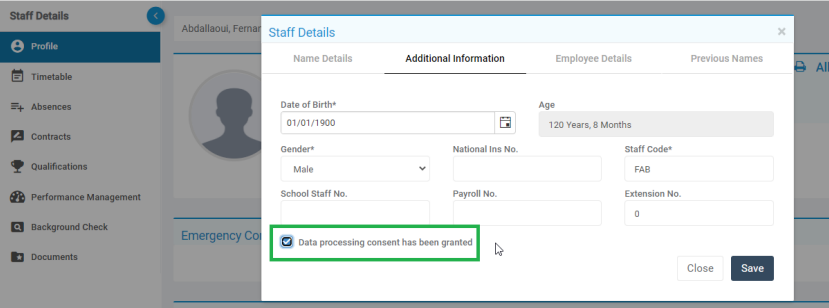 Staff Page
Troubleshooting
401 Unauthorised: If the third party provider is encountering this error, this will either be due to the permissions on the account provided to them or the username / password combination is incorrect. Therefore please ensure all permissions have been assigned to the account as per the their instructions. If the permissions are correct for the third party account, please navigate to Modules -> Setup -> System Users. Select the account and reset the password.