Configuring Data Collection Sheets in MyChildAtSchool
MyChildAtSchool (MCAS) can be used to give parents/guardians access to data collection sheets. In this KB we’ll show you how to configure data collection sheets both for current students, and preadmissions.
Navigating To The Settings
You can configure data collection sheets under Config>MyChildAtSchool>Students And Contact Details Settings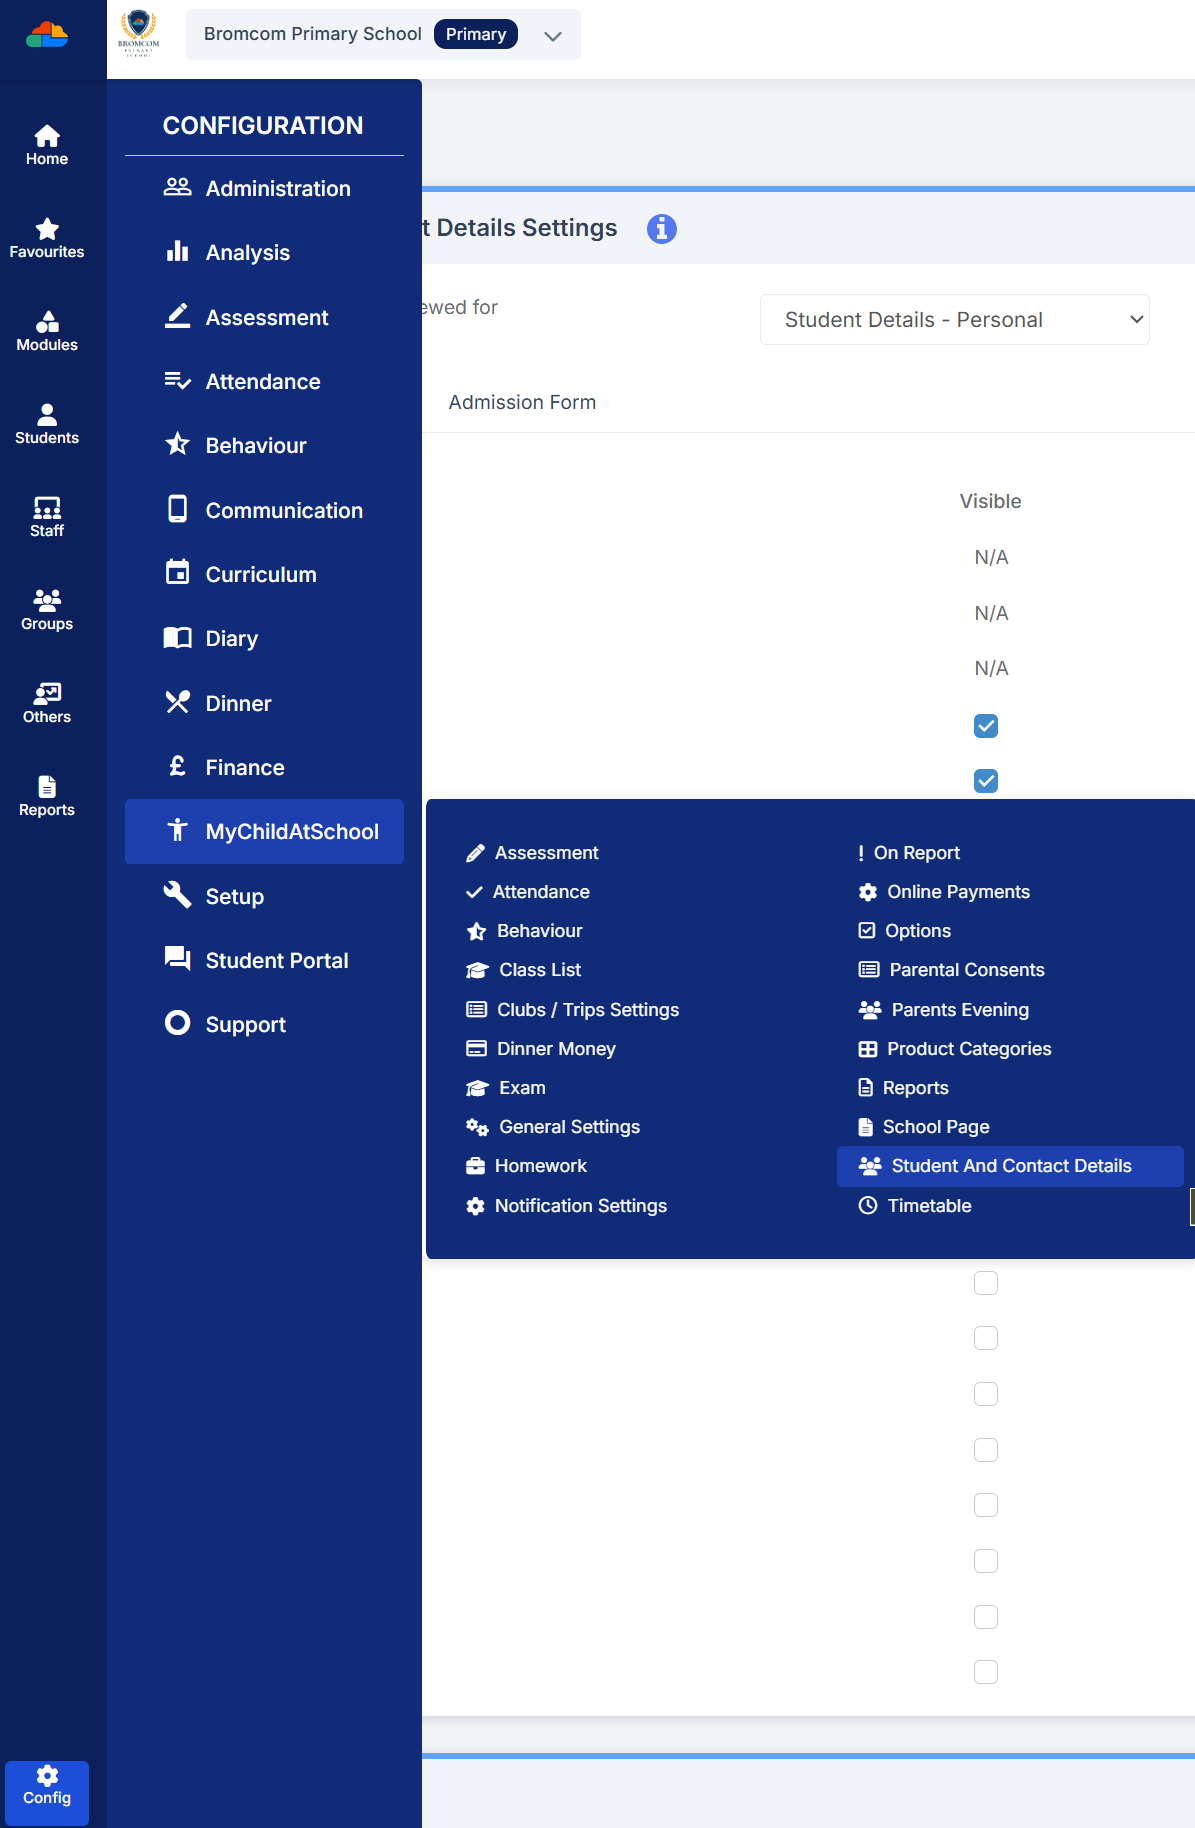
Form Permissions
In the Students And Contact Details Settings area you’ll see a dropdown field containing different types of student details, each one of these options will change the details you see in the list below allowing you to configure exactly what parents/guardians can see, edit, and what information you require. You’ll also notice that you can toggle between Data Collection Form, and Admission Form. This means that you can have separate requirements for parents/guardians of existing students, to those of students in preadmission groups.
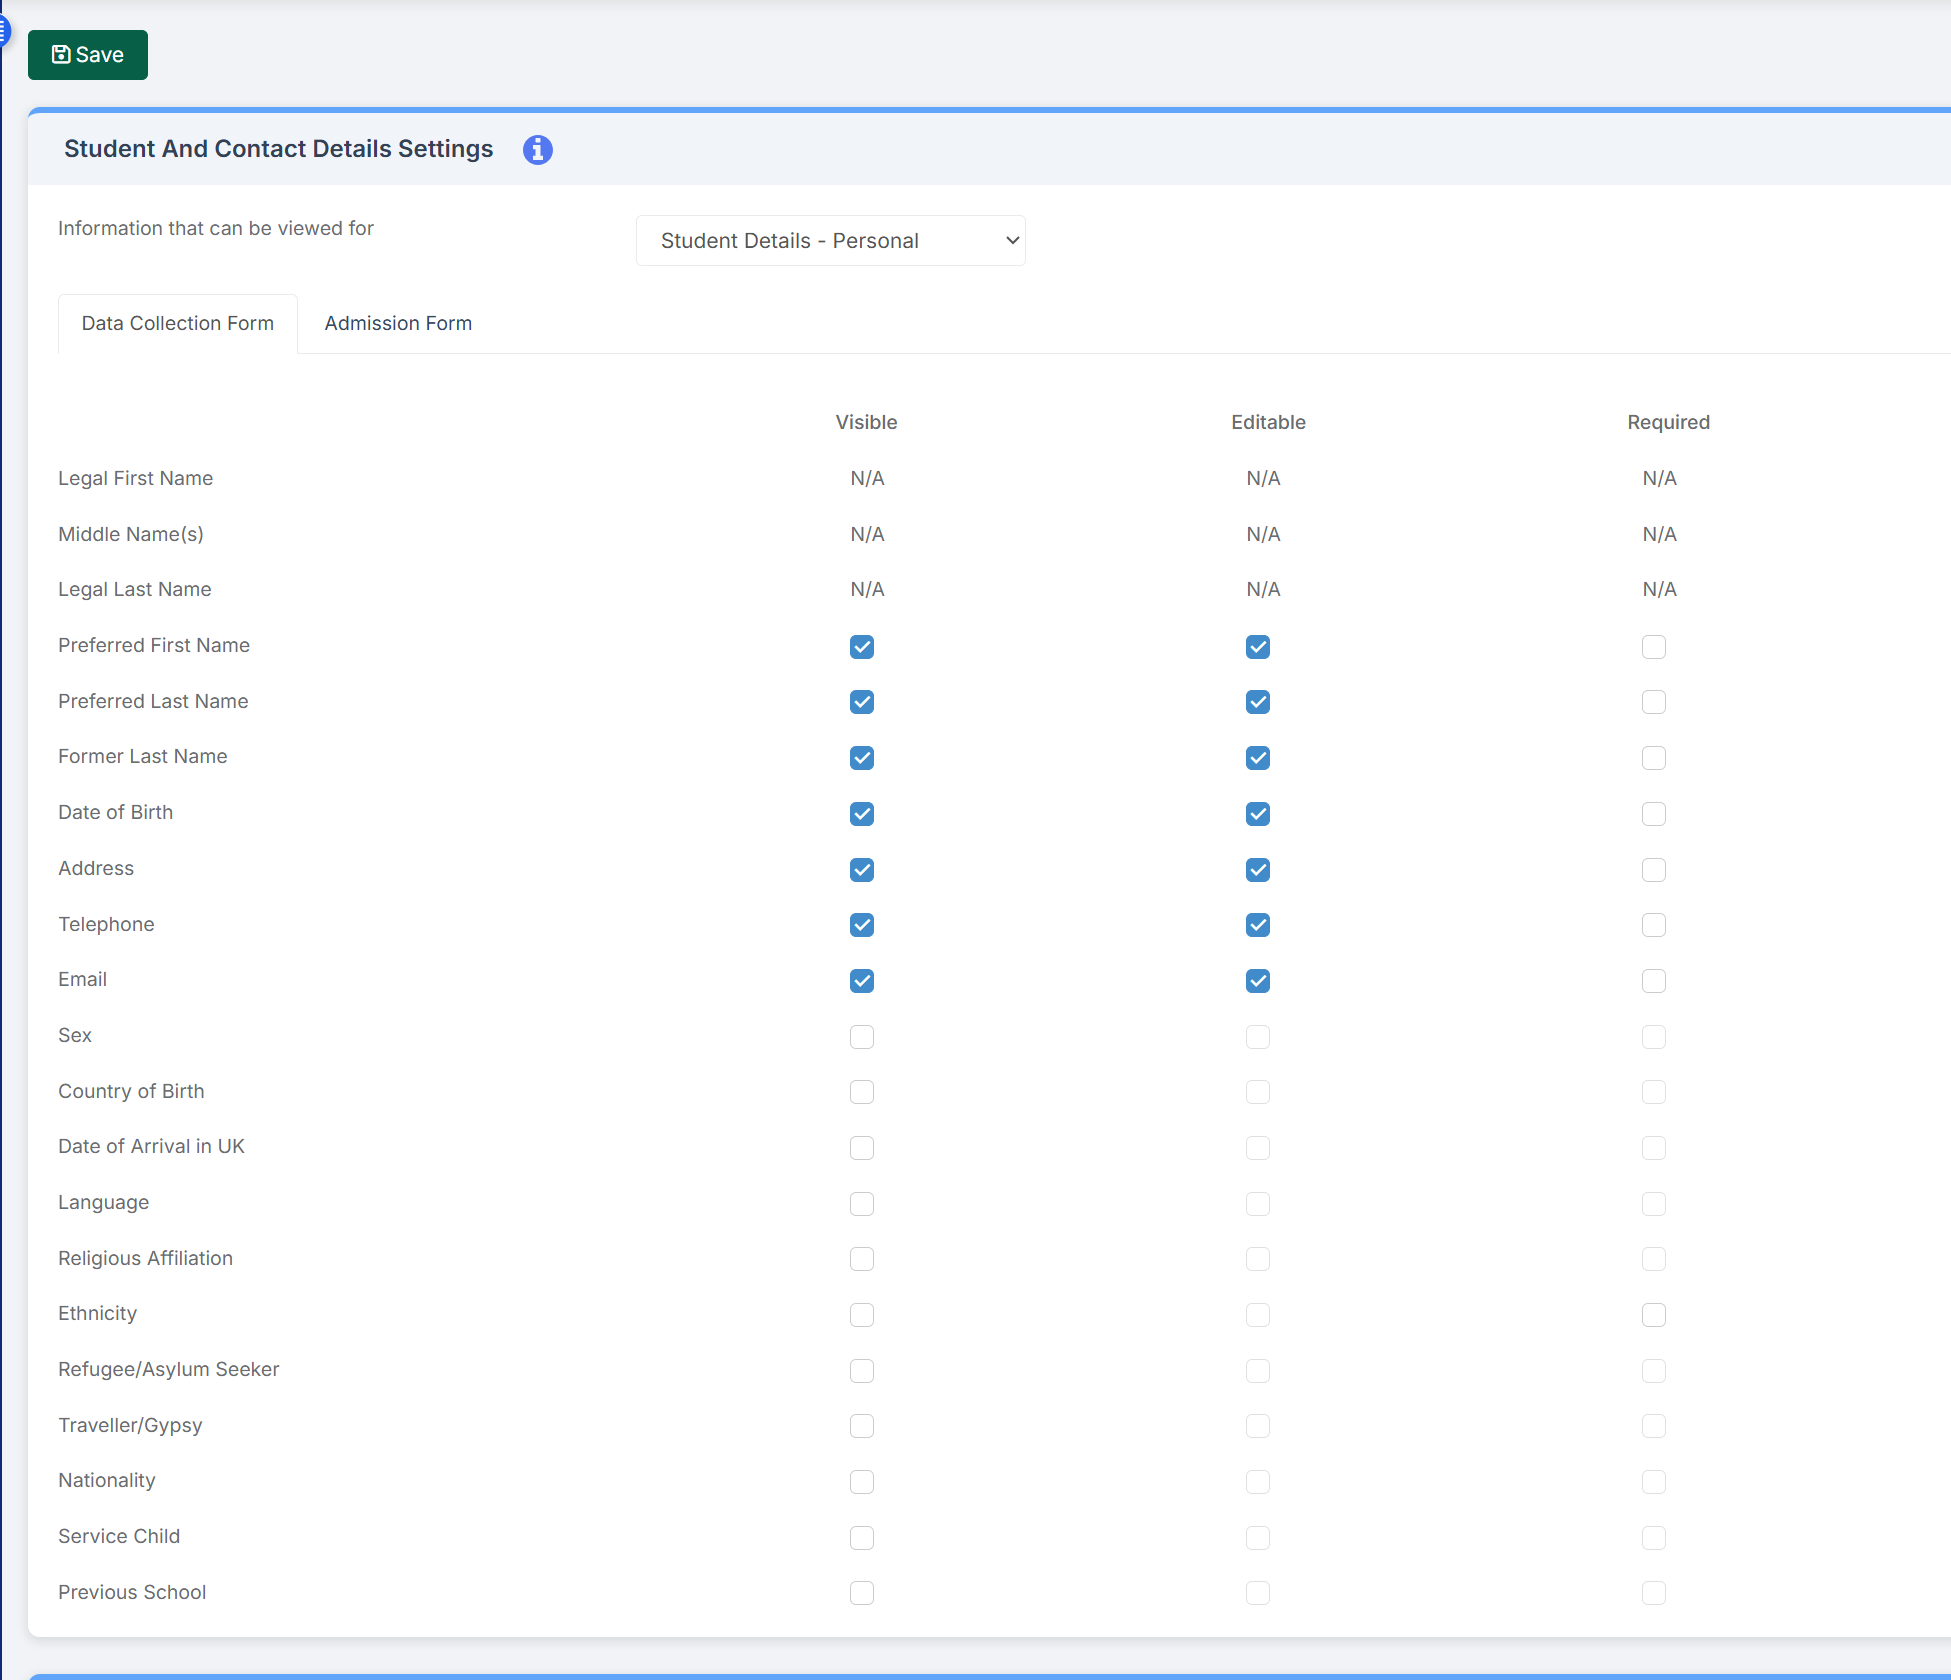
Before you can make something editable and/or required, you must firstly make it visible. Anything you tick as required will make the parent/guardian complete before being able to save the changes. When making changes to this area, it’s important to remember to click the save button in the top left of the screen, any changes you make won’t be applied until after you’ve pressed save.
Documents
If you scroll further down the page you’ll notice a Documents section, in this area you can attach any documents you might want parents/guardians to have access to whilst completing this process, these documents shouldn’t be student specific as everyone can see them. In the example below the school have uploaded a Home School Agreement allowing parents/guardians to download and complete a copy of the agreement if required.

When uploading a document to this area you can set whether you want parents/guardians to acknowledge they have read the document, this can then be tracked by clicking the number under the confirmed column pictured above.
Admissions Form
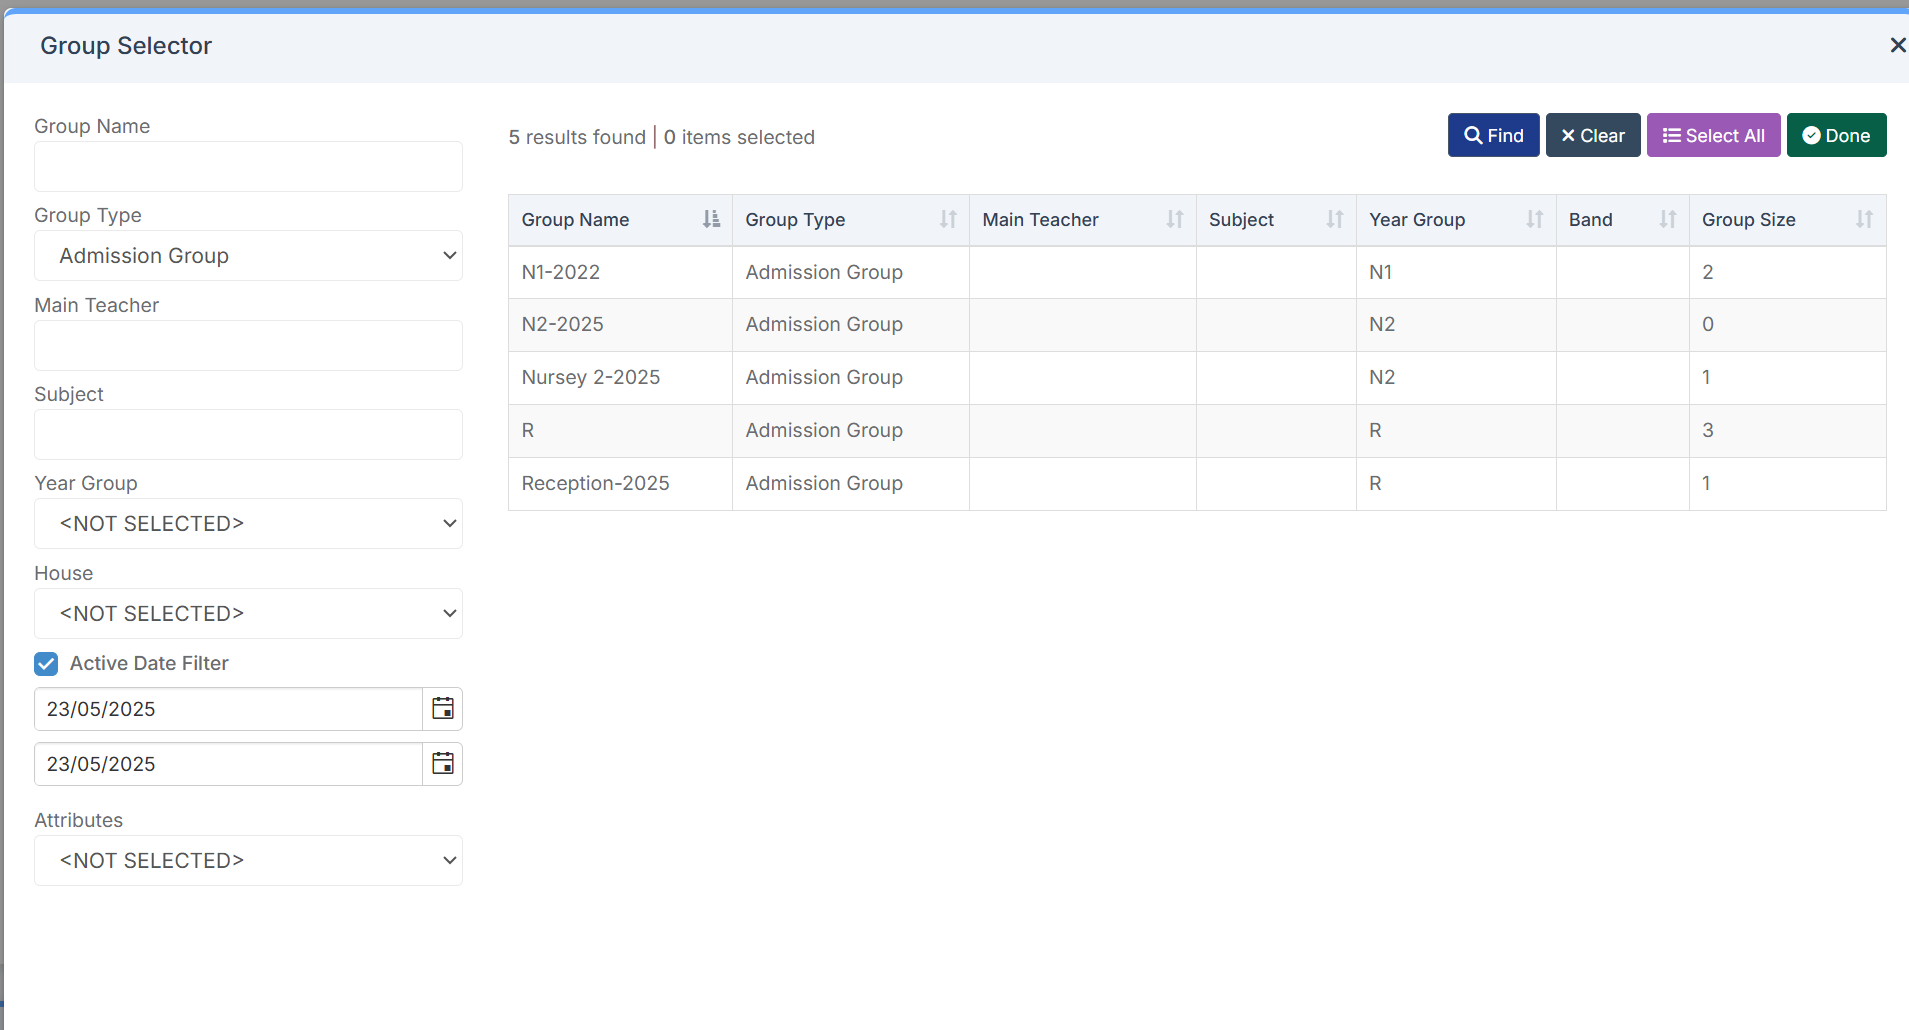
Below the Documents area you’ll notice the Admission Form Permissions area. In this area you will be able to select groups of Students whose parents/guardians will see the admission form for, instead of the regular data collection sheet. In the admission Form Permissions area click the magnifying glass next to the Linked Groups field, this will launch the Group Selector window allowing you to pick which groups of Students you want to assign to the admission form. Using the Group Type field you can filter the list to show you the admission groups, then after selecting a group, click the Done button to add them to the list.