Redstor Remote Backup Part 1; Installing the client software.
This document will enable you to
Install the client software for the scomis Remote Backup software
The required files are available on the Scomis / Redstor download page FAQ KB2880
If installing remotely, ensure that you are logged into the remote computer as a user with full local admin rights
http://faq.scomis.org/kb19432
If everything is OK then proceed as follows….
Software Installation
Download the backup Client Software from the Redstor downloads page here, click the latest version Redstor Pro v##.## (latest) then select the Pro Client tab and download the version appropriate for your operating system.
Check the free space on the device. You will need to have at least a quarter of a drive free for the installation, sufficient space to cache/encrypt the files for transit and to prevent low free-space errors.
Ensure you have all the details of your backup account, these will be supplied by the Scomis Service Desk, these will include
- Storage Group
- Password
- Account Creation Key
- Encryption Key
*Note: If this is a self-service installation then the above details will be provided by the local administrator of your self-service backup group.
Installing Redstor Pro ESE:
Running the downloaded MSI file, the Redstor Pro ESE Setup Wizard will appear. Follow the steps as described below. If you receive a Windows User Account Control message, asking you if you wish to allow the Redstor Pro installation program to make changes to the computer, click Yes to proceed.
.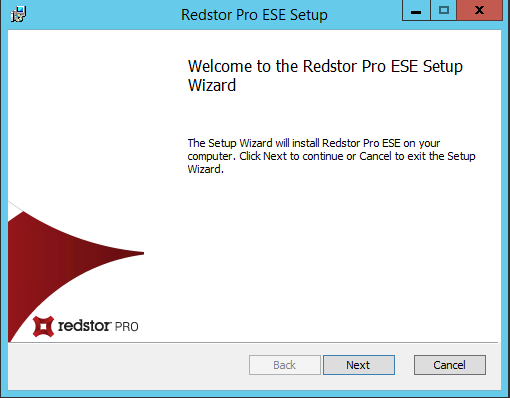
Click Next on the title screen,
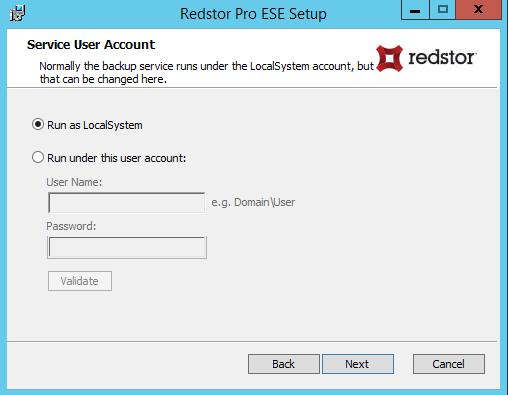
The default option is to run the backup service as LocalSystem, which should be sufficient in most cases (this can be changed at a later date if needed).
If you are unsure / not using another account, select Run as LocalSystem and click Next
Alternatively, to use a specific Windows domain user account:
Select Run under this user account.
In the User Name box, type the Windows user name for the account.
In the Password box, type the Windows user account password.
Click the Validate button.
Once the Windows user account has been validated, click Next.
Warning: When specifying an account other than “LocalSystem”, please ensure that the user account has full access to all files to be backed up. If files are included for backup that the account does not have access to then the files will not be backed up and ‘Skipped files’ error messages will display in the backup logs.
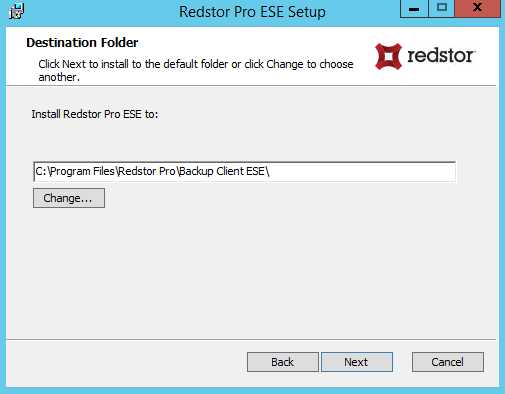
Specify an install location. This should be on a drive with the most available free space, ideally at least a quarter of available drive space. If your server only has a small-sized C: partition, do not install it to C:, specify another drive letter.
To specify a new destination folder:
a. Click the Change button.
b. Browse to the folder.
c. Click OK.
d. Click Next to continue to the next wizard step.
Alternatively, to accept the default destination folder just click Next
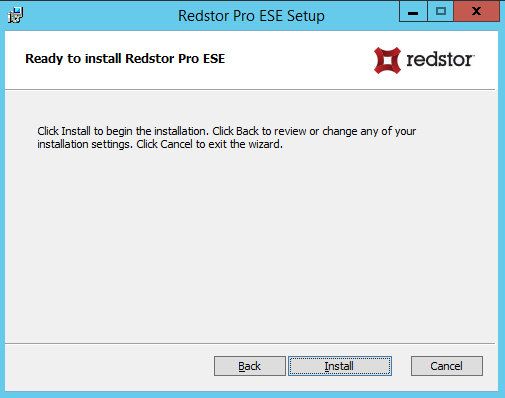
Click Install.
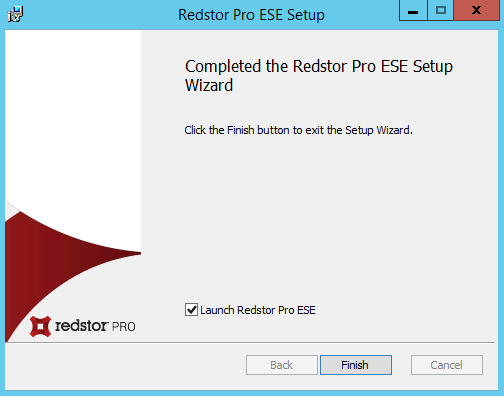
Ensure that the Launch Redstor Backup Pro ESE check box is selected and click Finish.
See FAQ KB19769 to continue.