|

Bromcom Finance and DTSApps: How do I process my Petty cash file – DEVON SCHOOLS

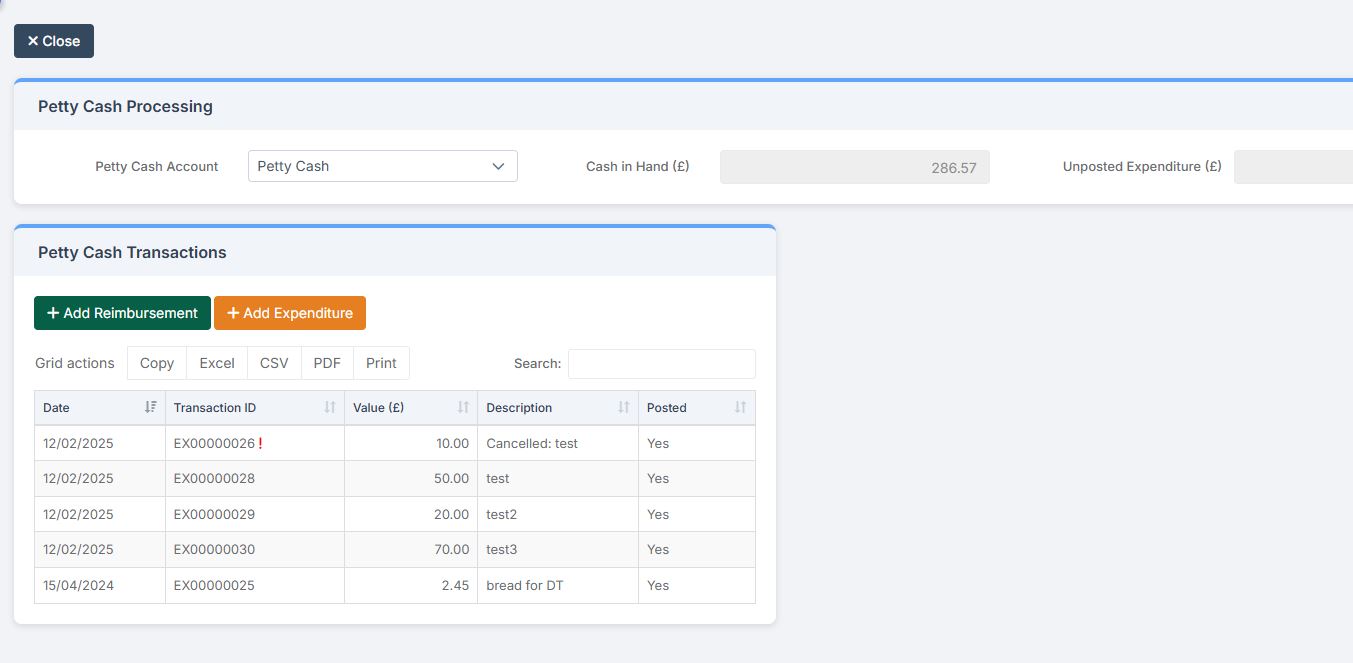
Navigate to Modules> Finance> Homepage> General ledger> Petty Cash Processing.

1) Click the yellow button to add an expenditure or green button to add a reimbursement
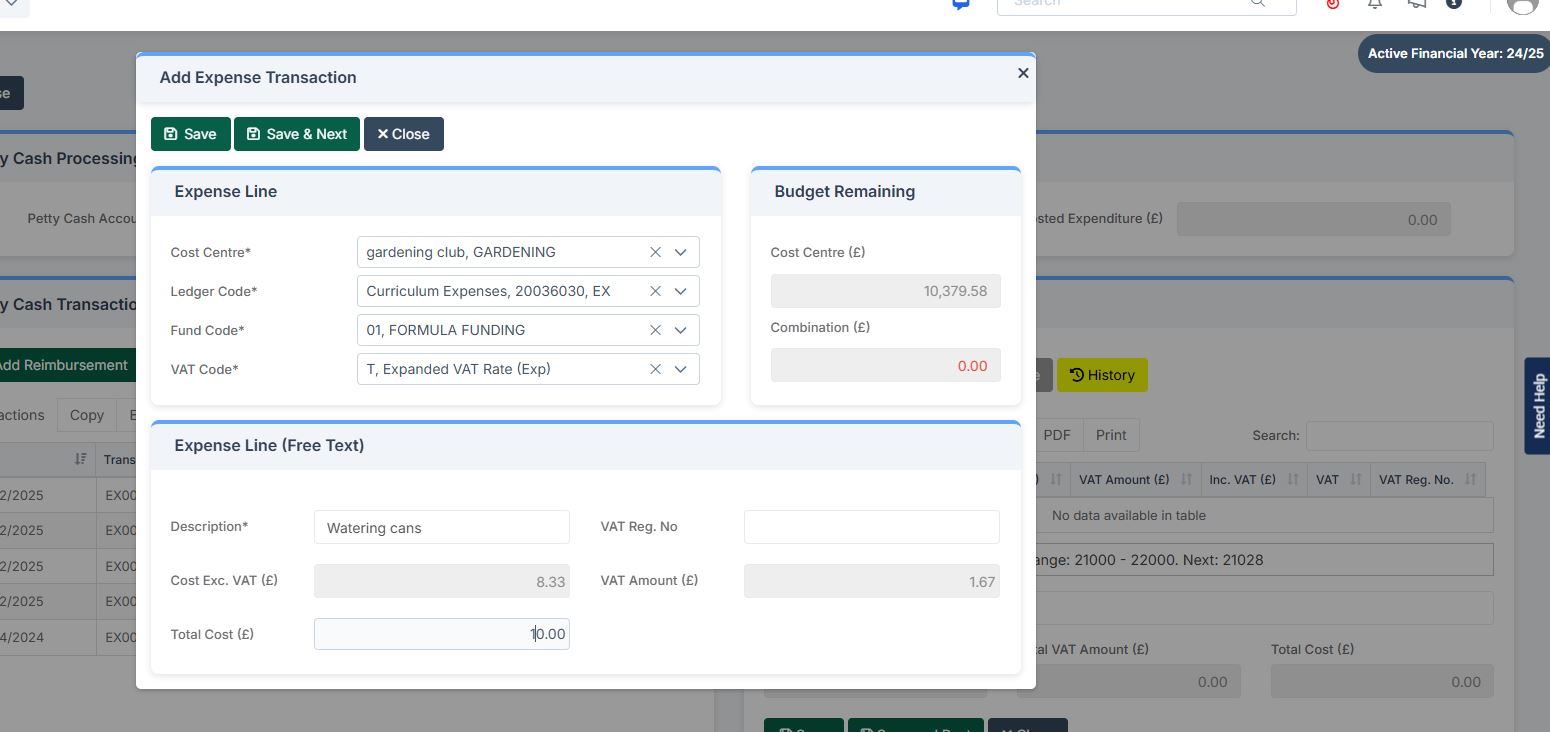
2) Add your expense lines on the right hand side

VAT Reg Numbers

Note : When adding multiple lines of expenditure, please remove the VAT Reg number if not required, as it will copy from the first expenditure line and then click save /or save and next.
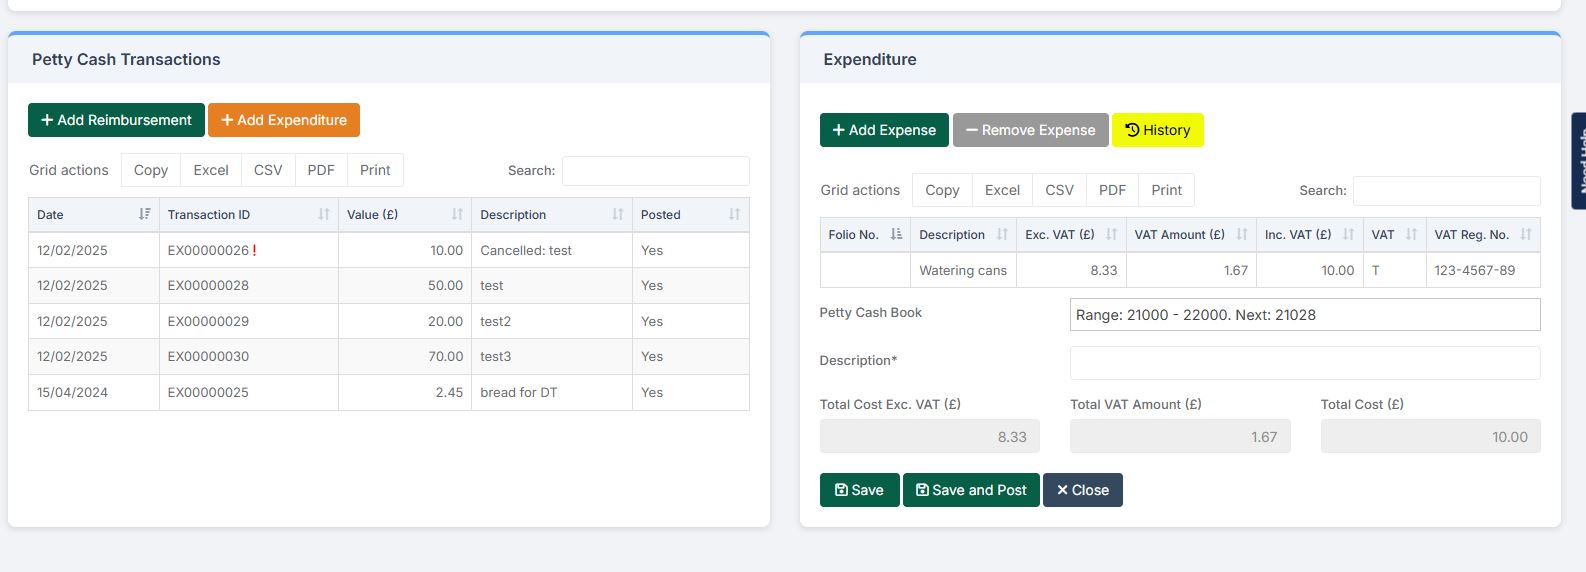
3) Once you have added your expense lines, save and post. Once this has been done you can click the file on the left, which will then show your multiple expense lines on the right.  Please then download CSV on the right hand side window, as this will show all expense lines and is the required file for DTSApps.

Note: The left hand csv, only shows a total and is not correct file as advised in step 3
4) Open DTSAPPS and login

5) Click Petty Cash Processing on the left hand side

6) Upload Petty Cash CSV File

7) This will load your petty cash transactions. You will need to add the ledger code and fund code for each line of the petty cash claim. Once you have filled in all missing details you can click on ‘Commit Transactions’. You will then go to a new screen where you can print your authorisation report.

Note: Adding ledger codes is currently a workaround until Bromcom release a new report (Currently in development) then this step will not be necessary
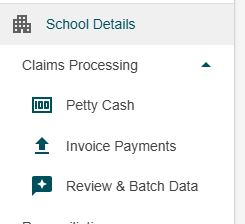
8) Click Review and Batch to create your petty cash file.

IMPORTANT – You DO NOT need to upload the reformatted file via Devon Transfer. This step has been removed

9) The file will be uploaded automatically from DTSApps to Unit 4 for processing. You can view the file but you DO NOT need to download. Download is automatic, downloaded files will go from the green area to the grey area when the file has been transferred to UNIT4. The green download button will not be removed on Day 1 so please ignore the download button. These files will still have a send number.

Should you need to download for any reason the following message will appear:
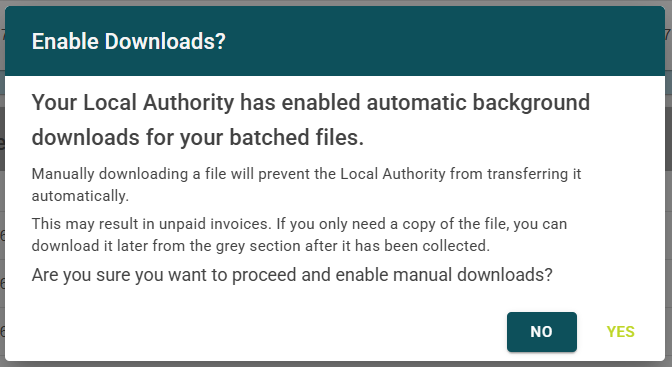


Clicking Yes to this message will then download the file.

How useful was this article?

Click on a star to rate it!

Average rating / 5. Vote count:

No votes so far! Be the first to rate this post.

Similar Posts

  • Bromcom: Why can’t I see all of the exam seasons?

    This maybe due to your data boundary. Check under your account profile by going to your photo in the top right-hand corner of the MIS, My Account > Current Interval.   Data Boundaries are used to define what Staff can view in relation to current and historic Student Data, for example External Staff may only require the Current Years Data.   From the…

  • Configuring Data Collection Sheets in MyChildAtSchool

    MyChildAtSchool (MCAS) can be used to give parents/guardians access to data collection sheets. In this KB we’ll show you how to configure data collection sheets both for current students, and preadmissions. Navigating To The Settings You can configure data collection sheets under Config>MyChildAtSchool>Students And Contact Details Settings Form Permissions In the Students And Contact Details…

  • Bromcom Finance & Budgets: How do I sort columns in my Budget Variance

    Modules> Finance> Homepage> Budgeting> Budget Variances You can click on any the heading e.g  Cost Centre Description and drag to above “Drag here to set row groups”   –  see example below before sorting Example after sorting to Cost Centre description Please also see Budget planning user guide     How useful was this article? Click…

  • End of Year Procedures 2026

    This FAQ lists the latest information regarding the End of Year procedures within Arbor and Bromcom. It contains all guidance notes required to carry out end of year procedures in your school. You must complete these procedures before the start of the new academic year.    Arbor End of Year Guidance For managing Applicants and…

  • Third Party Application integration with Bromcom

    When looking to integrate a third party application, it’s best to liaise with the third party for more detailed instructions. The purpose of this guide is to explain how a new User Account can be created to give Third Party Supplier’s access to data in your MIS system through Bromcom’s API interface, which is required for all…