|

Bromcom: How to view Year 2’s Phonics results from when they were in Year 1

If you need to view your current Year 2’s Phonics results from the previous year, you can do so using a report.

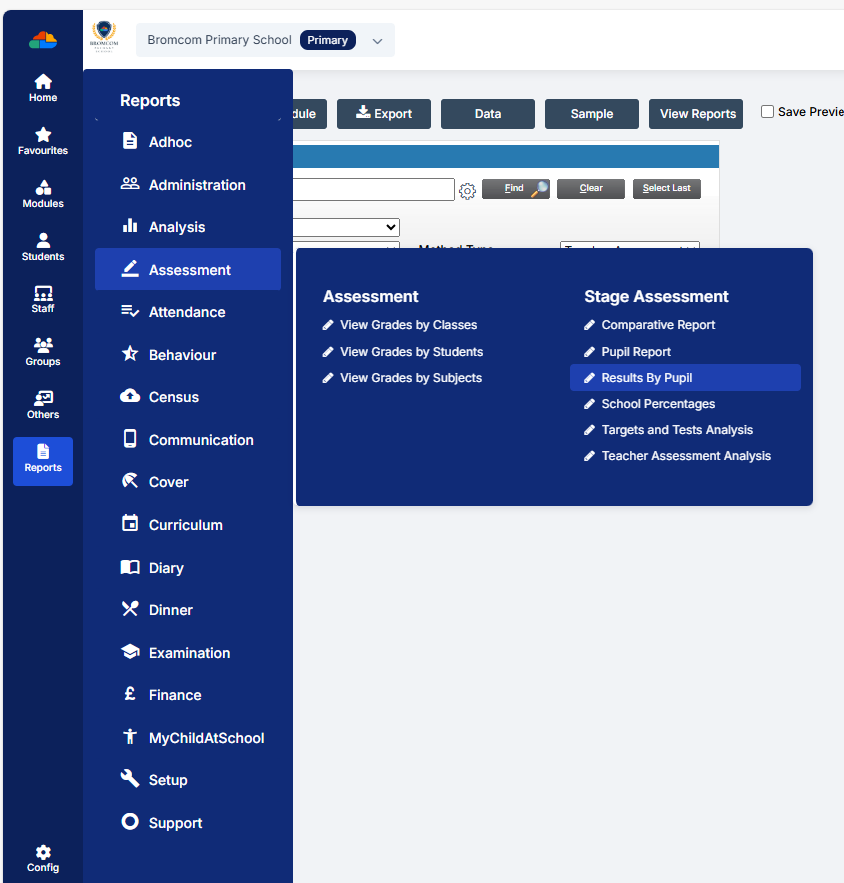
Go to Reports on the left hand side menu, then Assessment and then Results by Pupil

Use the find button to select all of your current Year 2 pupils

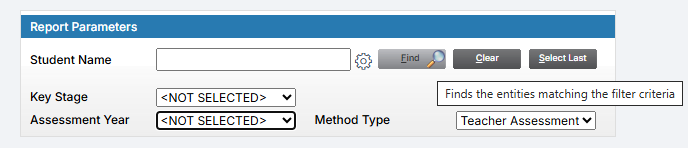
Now select KS1 from the Key Stage drop down

Then choose the assessment year


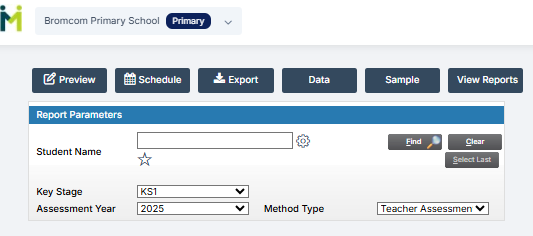
Now you can either preview or export the report as needed, and it should show you the results of the Year 1 Phonics assessment for your current Year 2 pupils.


How useful was this article?

Click on a star to rate it!

Average rating / 5. Vote count:

No votes so far! Be the first to rate this post.

Similar Posts

  • School Workforce Census Bulletin 2025

    This FAQ lists the latest information regarding the School Workforce Census. It contains links to relevant documentation for Arbor and Bromcom. School Workforce Census Date: Thursday 6th November 2025 School Workforce Census Deadline Date to DfE: Friday 21st November 2025 (If you are a maintained school please consult your LA) Latest Census Information KNOWN ISSUES…

  • Bromcom Finance: How do I add a Petty Cash into the new year

    If you have not run preliminary close in the old year and need money in Petty cash  “Cash In hand” you can add a temporary reimbursement as follows: Modules> Finance> Homepage>General ledger> Petty cash processing Click “Add Reimbursement” as show below and add your details on the right of the example screen shot. Please note:…

  • BROMCOM: How to Add Staff to Edit/View Marksheets

    For Key Stage Assessments after you have access via BROMCOM: How to add ‘Configurations’ to a Role for Key Stage – Frequently Asked Questions Go to Config > Assessment > Configurations and put the tick in Enable Sheet Users.         You can then tick which Staff Roles will require access to the marksheets…

  • BROMCOM: How can I transfer a Dinner Balance to a Running Balance Club Balance?

    Modules>MCAS.View>View Balances.  Select the student and then click on “Transfer” and enter the transfer details.         How useful was this article? Click on a star to rate it! Submit Rating Average rating / 5. Vote count: No votes so far! Be the first to rate this post.