Add shared drives to your desktop on OSX (Mac)
To add shared drives (shares) to your OSX desktop you will need to be connected to the network e.g. school or admin network.
You will also need to know the following:
- name of the computer you are connecting to (e.g. SERVER, SCOSERVER, ADMIN1) and
- the username and password you use to get access to the drive.
Once you have this information in Finder:
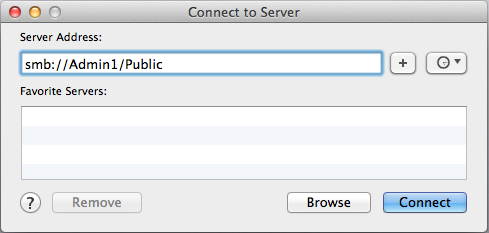
- Click Go – Connect to Server and enter the server address in the following format: computer name and share:
e.g. smb://Admin1/Public
- You will likely have to enter your username and password at this point.
- Once this is done you will see the drive on your desktop.
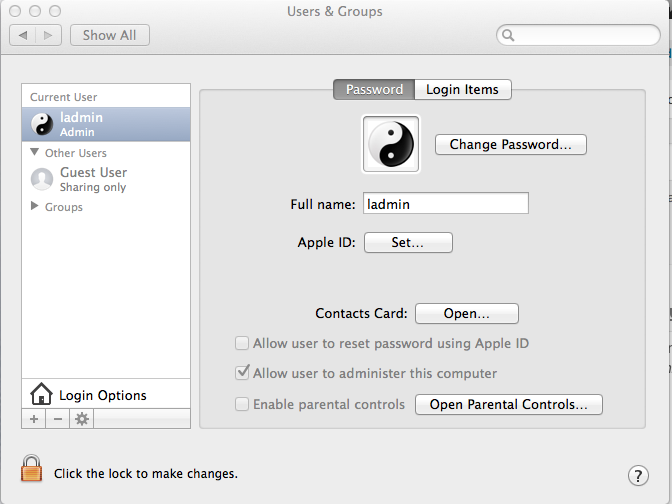
- Open System Preferences and select Users & Groups

- With your username selected on the left, on the right hand panel click Login Items
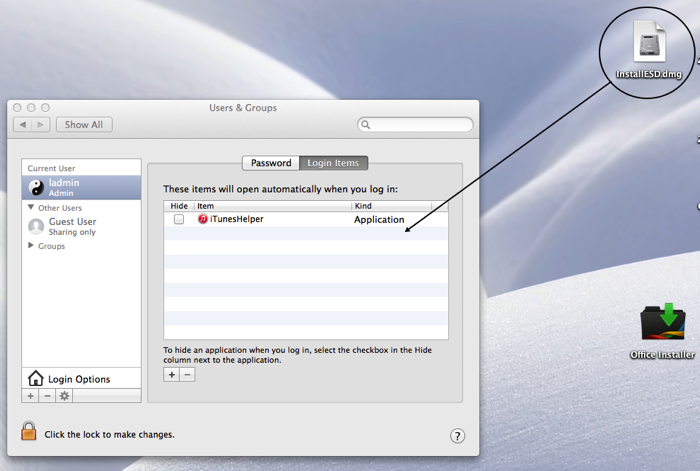
- Click and drag the Drive icon from your Desktop into the login items panel
 NOTE – Make sure you have clicked the Padlock in the bottom left so you are able to make changes.
 - Repeat this process to add move drives to your login.
- Now when you log in these drive will automatically show on your desktop when you log in to your Mac.
Reviewed on 12/01/2026