How to add a new Windows user – Windows
The following steps explain how to create a new user on a Windows operating system:
Note: The images used in this article are from a previous version of Windows, however the process is the same in modern versions of Windows.
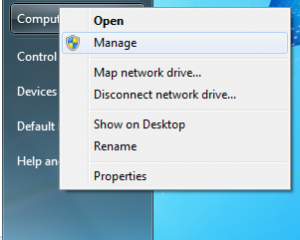
- Press Start, right hand mouse click on Computer and click on Manage.
- You will then be presented with the Computer Management window. You will need to click on the folder on the right hand side under Computer Management called Local Users and Groups and then click on Users.
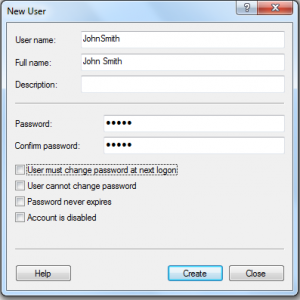
- When the list of users is open on the screen right click below the list of names and select New User. You will see the screen displayed below and will need to fill in the details, the description can be left blank
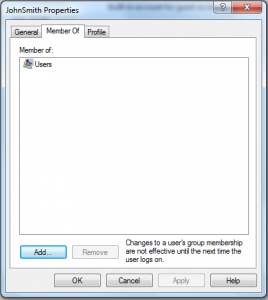
- Once the user is created you will now be able to assign them further permissions if required. To do this you will need to right click on their username and click on Properties. Go to the Member Of tab and press Add.
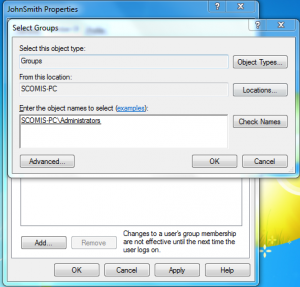
- To add a user to a group, you will need to enter the object name. An example of this would be Administrators. If you type in Administrators and press Check Names it will automatically fill in the Administrator permission. You will then need to press OK and then Apply and this process will then be complete.
Reviewed : 12/01/2026


