Bromcom Finance: How to Import your reconciliation file and deal with failed reconciliation items
Once you have downloaded your file from your local authority the next step is to import the reconciliation file into Bromcom Finance.
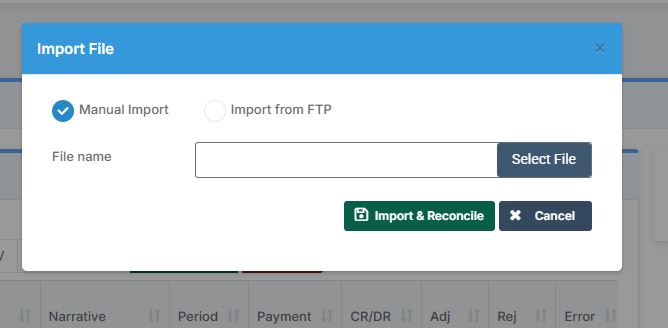
1 ) Navigate to Modules > Finance > Homepage and select Routines > Automatic Reconciliation. Click the purple Import button top left and browse to file location of the reconciliation file
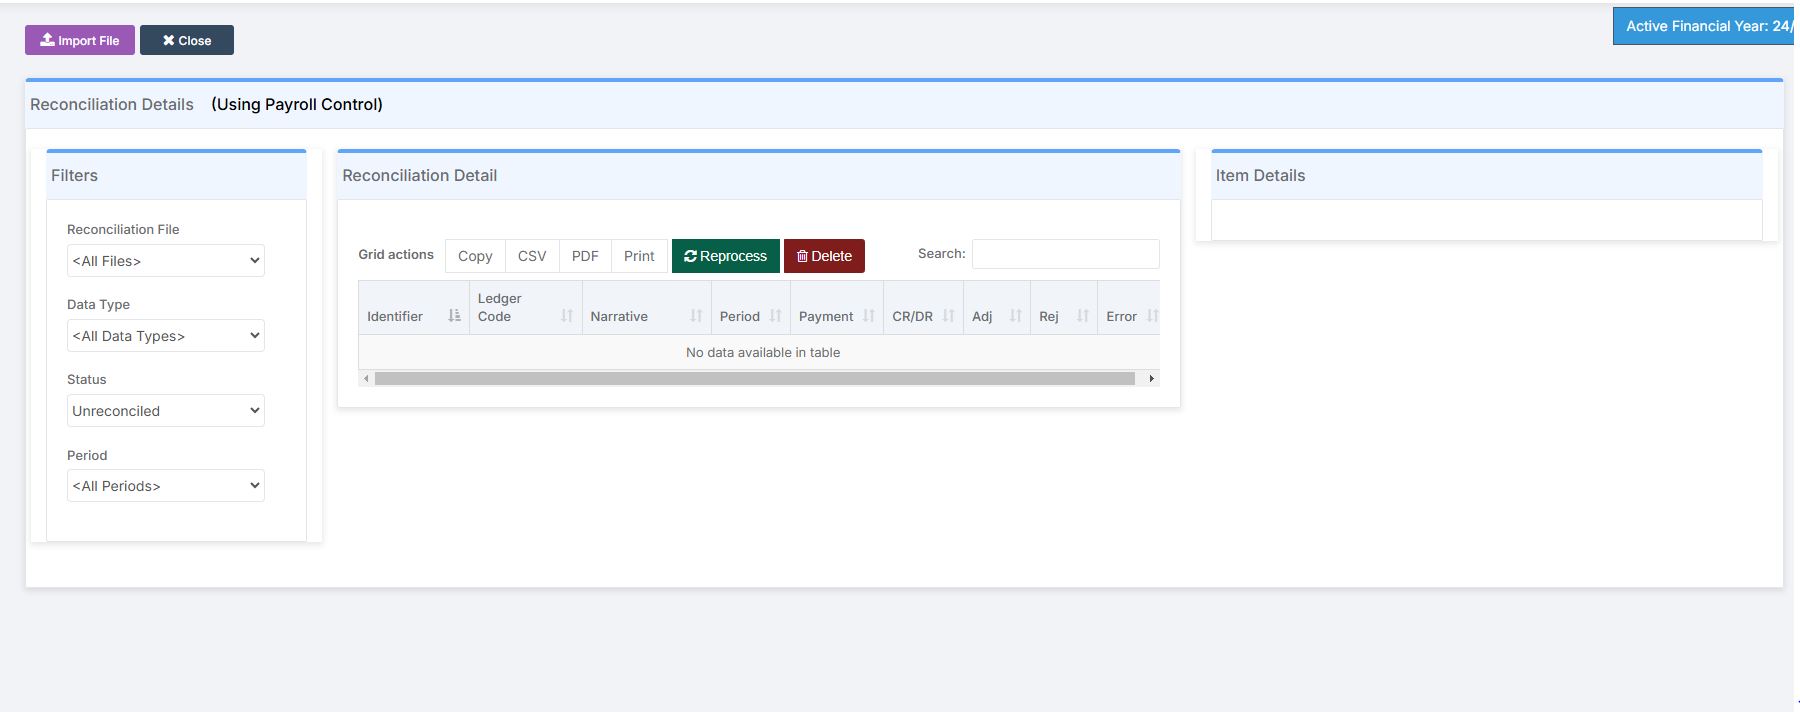
2) Select file, then click the green “Import & Reconcile” button. (Please note. you can only import a txt file type)
How does Bromcom process the payments in my reconciliation file
Note : It is Important to understand that the reconciliation process is going to be different to your previous MIS and this FAQ aims to outline how you deal with reconciliation items that have not auto reconciled.
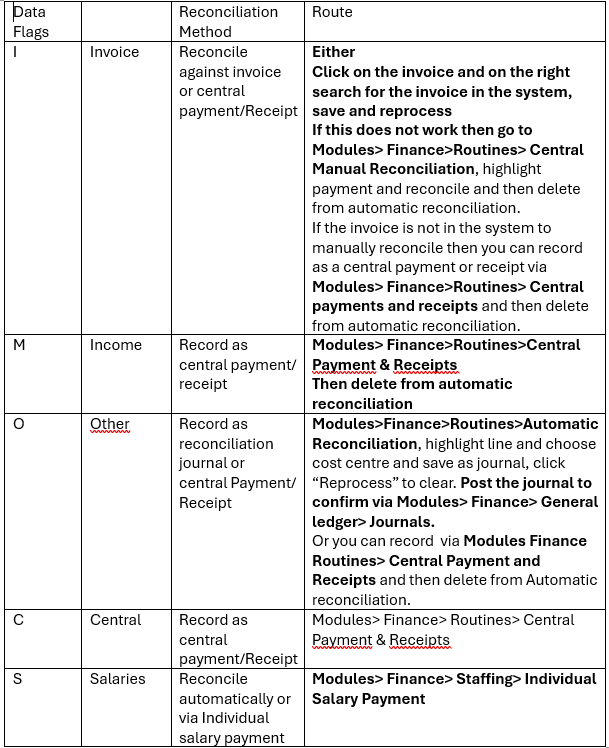
Data Flags
All payments lines in the file sent by County, have a data flag (You can open the file in note pad to view them down the left handside) You will see the following data flags by each payment in the reconciliation file, this determines how they are handled in Bromcom.
Note the data flags will not show on import, this is to explain how your file is handled and read by bromcom on import.
Types of payments and how to reconcile them from the “Automatic reconciliation” screen:
Important: If you have any invoices that have multiple lines and fail reconciliation, you will need to manually reconcile them and then delete from automatic reconciliation once reconciled. These types of invoices are being worked onto reconcile automatically and we will update this FAQ to advise.
How to process supply payments/casual staff payments – Highlight the payment line and select the cost centre, If you need to map a ledger code such as an overtime ledger code, you will need to map the ledger code to the relevant base pay structure. Please see the following guidance How to add a ledger code to base pay mapping Once you have selected the cost centre and confirmed the ledger click save, the reconciliation item will be recorded as a journal.

You can then click the “Reprocess” button to clear the item from the “Automatic screen””
Important if you process a payment by the above method, you will need to post the journal via Modules > Finance > General ledger > Journals and post the Journal, to confirm the payment
Central payments/Receipts -This method does not clear the item on “Reprocess”
You can if you wish process the above types of payments via Modules > Finance > Routines > Central payments & Receipts
Duplicate your Bromcom screens
It is recommended that you duplicate your tab so that you have have two windows open, one for automatic reconciliation and the second for recording the payment or receipt. Right click on the web browser Bromcom bar and left click
5) How to process other payments and income
Income payments can be recorded via central payments and receipts and then deleted off of automatic reconciliation – see guidance below for processing central payment and receipts
Detailed guides below
How to process journals using automatic reconciliation
How to add a ledger code to base pay mapping
How to process Central payment and receipts