Deploying Updates/Patches via Solus 3 Manually
If your updates are not scheduled to run automatically then follow the below procedure to use Solus 3 to check for updates.
On the machine where Solus 3 is installed, run the SOLUS3 User Interface from the icon on the desktop.
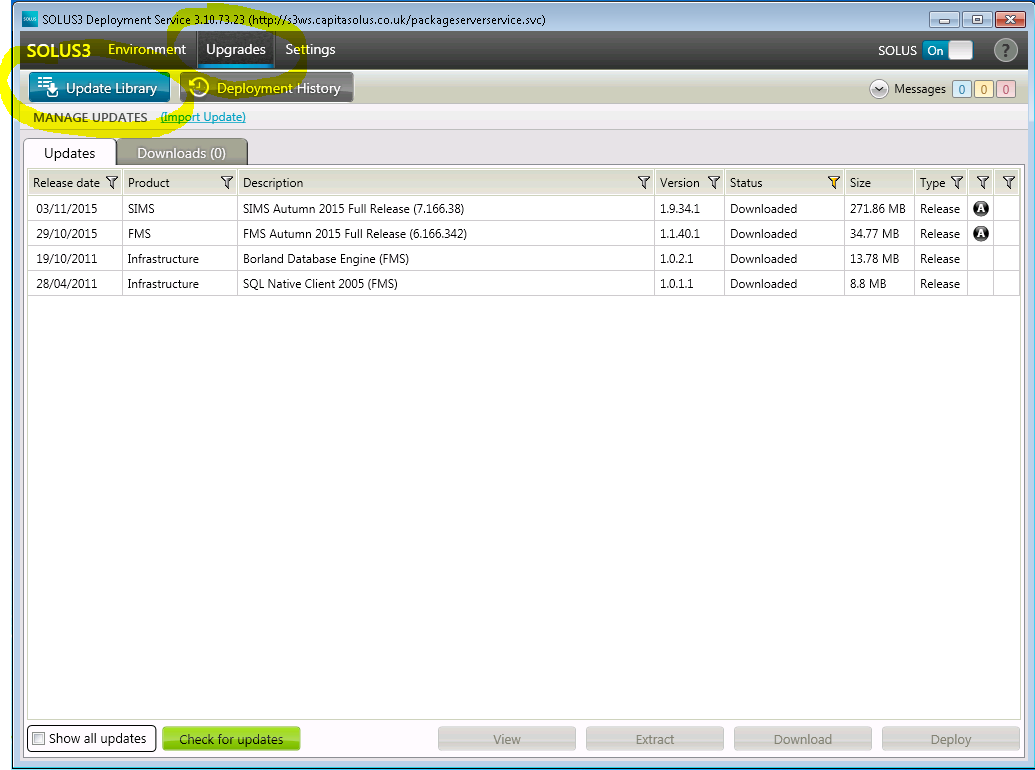
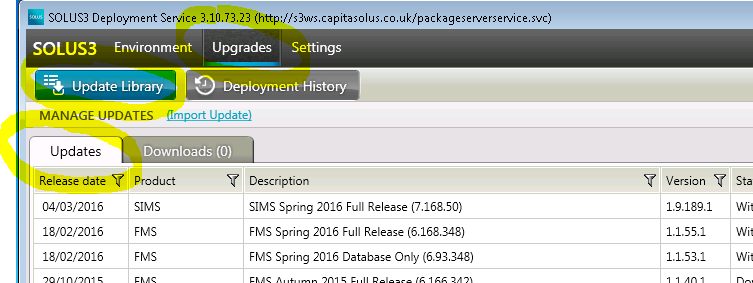
From the main Solus 3 screen, click on “Upgrades” and then “Update Library” and the “Updates” tab, When your Solus 3 system was setup, it was set to automatically download any updates allocated to your school on a daily basis. Therefore any updates/patches that have been previously allocated to your school will be listed here :
If not, then click on the update to select it and then click on the “Download” button to download the update.
When the file has successfully downloaded, the status will show as Downloaded.
Now that the files have successfully downloaded you can go on to schedule the upgrade to run overnight or Deploy it straight away.
To schedule the SIMS .Net Update to run automatically overnight; first check what time the nightly scheduled backup will be running so that this update can be applied after this time.
No users must be logged in to SIMS, FMS or Discover when you perform this upgrade.
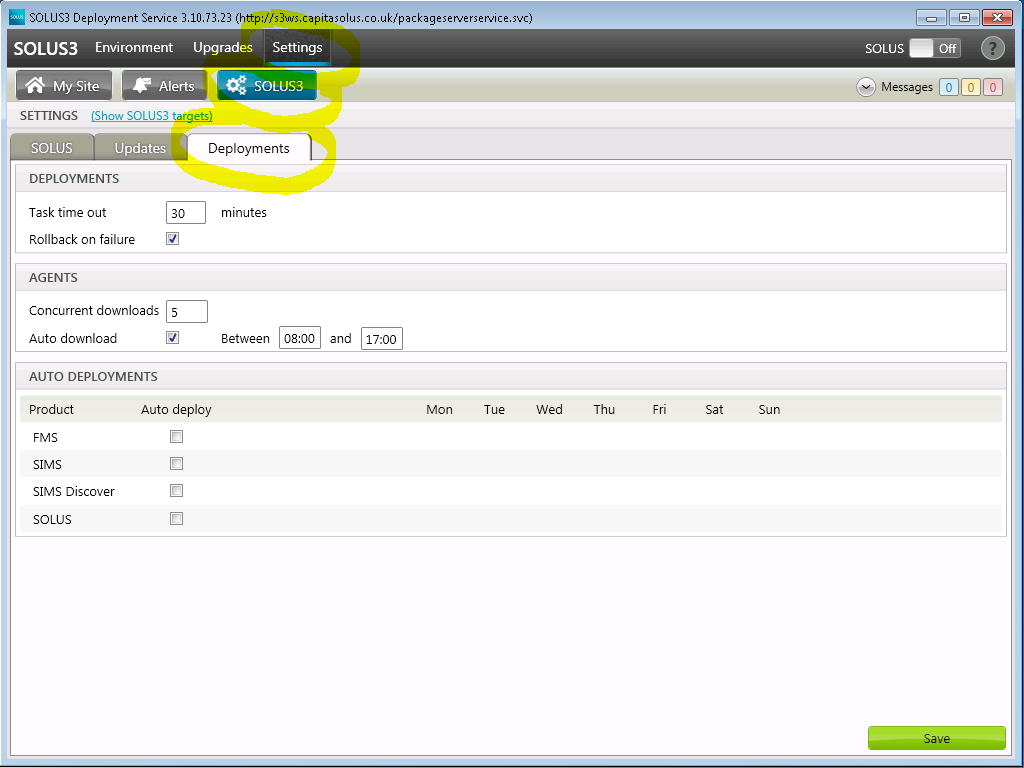
From the Main Solus 3 screen select the “Upgrades” button, then the “Update Library” tab and then select the upgrade you wish to schedule.

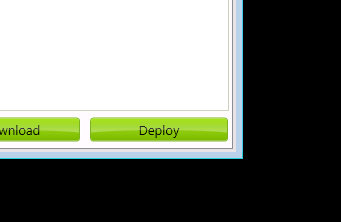
Click on the “Deploy” button in the bottom right of the screen.
On the next screen, in the bottom left of the window, click on the “Calendar” button to select the date to deploy the update. Enter the desired time for the deployment to start in the “Time” box. Click the “Schedule” button.
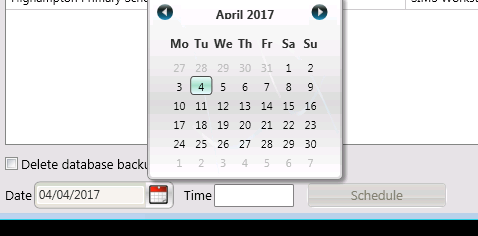
Click “Yes” if you are happy with the date and time selected.

If this is the only update you are scheduling then click “Yes” to be taken to a screen where you can check the scheduled updates. If it not the only one and you have more to schedule, click “No” and repeat the previous steps until you do have all the required updates scheduled.

When clicking “Yes” you will be taken to the below screen, which will display a list of the scheduled updates.

On the night that you apply the update, you should leave your SIMS workstations switched on (but not logged on) – that way, when Solus 3 sends out the workstation update it will find the PC on-line and apply the update immediately.
If the workstation is off line at the time of the upgrade, then Solus 3 will send the update when it is switched on in the morning – this process can be slow so it would be preferable to leave the PC on overnight.
The upgrade will apply overnight on the day/time specified but you need to check the next day that the upgrade has completed successfully.
To deploy the update straightaway, click on the “Upgrades” button, then select “Update Library” and then the “Updates” tab.
Click on the update that you wish to deploy to select it and then click the “Deploy” button.
The next screen shows you the update that you have selected to Deploy, as well as a list of Targets (SQL Server, Workstations etc) that will receive the update. Its worth noting that it also shows you the status of each of these targets, only an “online” Target will receive the update. Once happy with the details, click on the “Deploy now” button.

Confirm that you are happy to deploy the update now.
The update will then be deployed, you can view the progress of it if you so wish.
If you click “Yes” to the above box, then you will be taken to the “Deployment History” screen, where the current progress will be displayed.
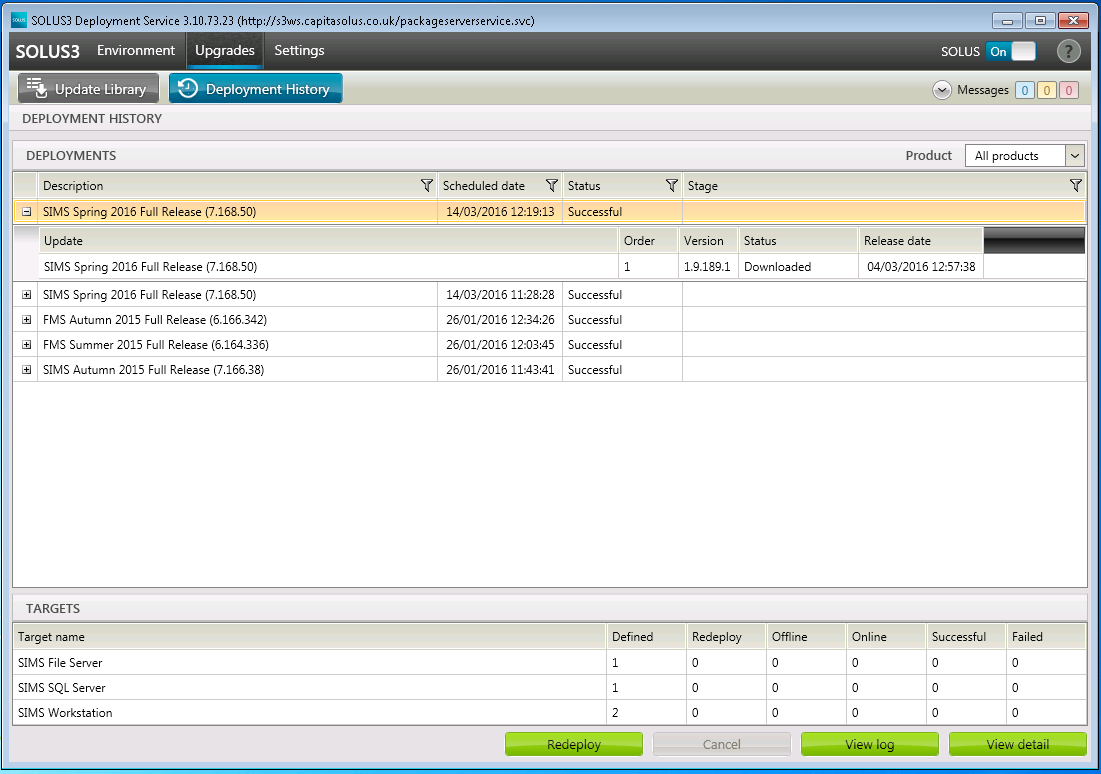
To check if the update has deployed successfully, open Solus 3 (if it isn’t already) and go to “Upgrades” and then “Deployment History”.

You will be able to see from the “Status” column if the update has succeeded or not.
If it was unsuccessful and failed then you can click on the “View detail” button which will show at what point the update failed (for example one of the workstations failed). You can also click on the “View log” button which will show the detailed log file created during the update process.