Using the Scomis – External Connector Diagnostics tool
The Scomis External Connector Diagnostics tool is located in C:\Support\ after the installation of an External connector. It can alternatively be downloaded directly from here.
If you have just installed an external connector and it is not working run this tool.
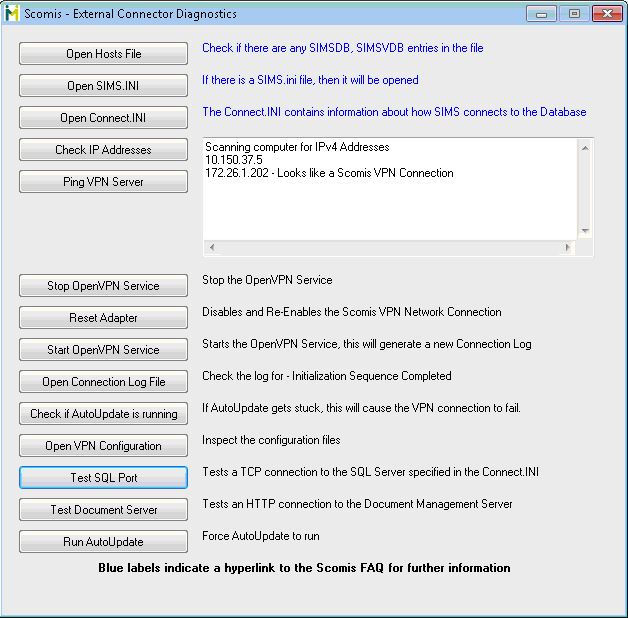
- Check IP Addresses:Click on Check IP addresses, if it only shows one address:
–
e.g. - Scanning computer for IPv4 Addresses
10.130.37.5
–
then the connection is not working.
– - Check Open VPN Configuration:Click Open VPN Configuration and notepad will open. Look for a line saying “up AutoUpdate.exe” type a semi colon at the beginning and save the file i.e “; up AutoUpdate.exe”
– - Stop VPN Service, Reset Adaptor then Start ServiceClick on Stop OpenVPN Service and then click Reset Adaptor. Wait a moment for the adaptor to reset (about 10 secs) and then click Start OpenVPN Service. Once the Service has started wait 2 mins as the connection isn’t instance (time taken maybe due to the schools internet connection)
– - Check IP Addresses againThis time you should see a second address:
–
e.g.
Scanning computer for IPv4 Addresses
10.130.37.5
172.26.1.202 – Looks like a Scomis VPN Connection
–
This shows the computer has successfully been assigned an IP address from Scomis. Click on Test Document Server and Test SQL Port to double check the connection is working. Once you’ve confirmed this you have successfully resolved the issue. The ‘Ping VPN Server‘ will most likely come back as unreachable, even though the connector is successfully working, which is currently being looked into. You can try pinging the database server in the connect.ini i.e. SIMSDB02 and in CMD try pinging this address to see if you get a response.
–
Picture of the tool is shown below for reference: