SLG – How to provision (add) users (teachers, students & parents) to SLG
This guide will take you through adding users to SLG, before continuing you should complete the FAQ on data cleansing.
Summary:
- Provision the users in SIMS.net
- Routines > Active Directory Provisioning > Provision Users > Students/Parents/Staff > Add…
- Search for the person you need to create an account for, click on “Select to add” then “Save”
- Wait for the scheduled task to run on your SIMS server or initiate it manually
- A scheduled task called; ADPScheduledProcesses.exe, SIMS SLG Provisioning, ADP Scheduled Task or similar has been created on your SIMS Server and set to run three times a day. It can be run manually if needed by an administrator of the server.
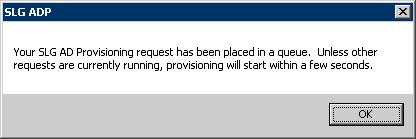
- For Scomis SIMS Terminal Server hosted schools in the SIMS.net launcher panel under Apps and Tools there is now a shortcut called SLG AD Provisioning**. Clicking this will start the process to queue your users for provisioning. Unless a large number of users are being processed this should take a few minutes.** If you do not have this shortcut in your toolbar speak to the SIMS Manager so they can add it for you.
- Wait for the accounts to be created on the Scomis ADP server
- Depending on the amount of accounts which have been created this part of the process can take from a few minutes to a number of hours. Please log a call with the Service Desk if your changes haven’t come through within 24 hours.
- Run the report in SIMS.net to obtain the new user credentials
- Reports > “Run Report”
- Focus > Staff/Student/Contact > ADP-User Account List
In Detail:
- Provision the users in SIMS.net
- Log into SIMS.net with a user who has “School Administrator” access permissions
- Click onto Routines > Active Directory Provisioning > Provision Users > Students/Parents/Staff > Add…

- Search for the person you need to create an account for; in this example we are looking for a teacher with the surname “smith”

- You can select one or many users from the results, click on “Select to add” once you are happy with your selection

- Click “Save” to provision the users which you have selected

- Once saved the list screen will be cleared so you can go back and browse to add some more users or move onto the next step

- Wait for the scheduled task to run on your SIMS server or initiate it manually
- A scheduled task called; ADPScheduledProcesses.exe, SIMS SLG Provisioning, ADP Scheduled Task or similar has been created on your SIMS Server and set to run three times a day. It can be run manually if needed by an administrator of the server.

- For Scomis SIMS Terminal Server hosted schools in the SIMS.net launcher panel under Apps and Tools there is now a shortcut called SLG AD Provisioning**. Please note: as a consequence of having to upgrade the ADP system to allow for the autumn upgrade changes we’ve broken the user initited functionality. Until it has been fixed the process is scheduled to run 7:45, 11:45 & 16:45 so you just have to wait for it to kick in).

Clicking this will start the process to queue your users for provisioning.
Unless a large number of users are being processed this should take a few minutes.** If you do not have this shortcut in your toolbar speak to the SIMS Manager so they can add it for you.
- A scheduled task called; ADPScheduledProcesses.exe, SIMS SLG Provisioning, ADP Scheduled Task or similar has been created on your SIMS Server and set to run three times a day. It can be run manually if needed by an administrator of the server.
- Wait for the accounts to be created on the Scomis ADP server
- Depending on the amount of accounts which have been created this part of the process can take from a few minutes to a number of hours. Please log a call with the Service Desk if your changes haven’t come through within 24 hours.
- Run the report in SIMS.net to obtain the new user credentials
- The user can now log into SLG where they will need to choose their own password


reviewed 09/03/2017


