Hosted User Management
Introducing the Hosted User Management App
The Hosted Applications Service User Management tools have been refreshed, with tighter intergration with SIMS.net as well as adding a few new features. The aim of the new tool is to replace all of the previous shortcuts, with a single multi-function app. The app will let you Request New Users, Reset Passwords and Enable or Disable your user accounts.
The app makes better use of the SIMS.net Business Objects to retrieve User Data from your SIMS Database, where it is used within the App to reduce errors commonly made when requesting user accounts. The app will now filter out SIMS user accounts which do not need a Scomis User Name allowing you to see the people you are interested in.
We now have 2 different methods for requesting a Scomis User ID, there is a method that will create the account for you and give you the details onscreen – note that this only works for people who have been entered as employees of the school. The older “Request” route is also available for temporary members of staff who may need access to your SIMS, this now removes people who are waiting to have their accounts approved by Scomis.
User accounts on our platform must represent real individuals and must not be employed for backup or special purposes. This helps to align with the principles of preventing unauthorised access and misuse of accounts as outlined in the Computer Misuse Act (1990), Data Protection Act (2018), and principles of GDPR (2018). We expect all users to accurately represent their true identity and purpose on the platform.
This FAQ walks you through the tabs and features of the application.
Instant New User
When the app loads, it will log into your SIMS Database and retrieve a list of Employee records that have been added in System Manager as Users of SIMS.net (see how to do that in SIMS.net). Once the list has populated, click on the employee that you which to create an account for. If you have a lot of employees, at the bottom of the list, start typing characters from the persons name into the “search for user” box, the list will then be filtered.
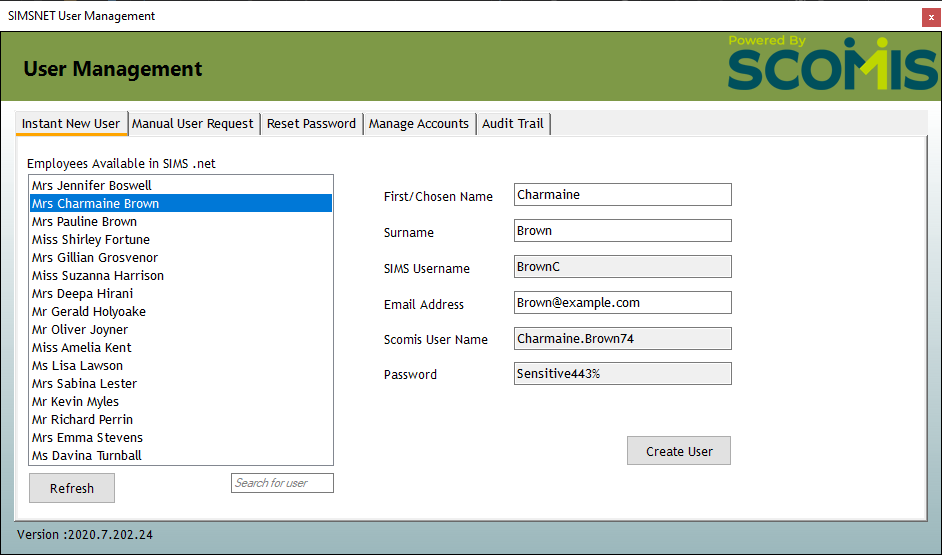
When you choose a user account, the details will be populated into the corresponding boxes, for first name and surname. Check these details are correct before proceeding. If you are creating an account for a person called Elizabeth, but they prefer to be called Liz or Lizzy, then you must close the App and update the Preferred name fields in SIMS .net.
All Hosted Applications accounts must now have an email account associated with them, this can be any validly formatted email address and preferably an email address at the schools email domain.
To create the Account, click the “Create User” button. The application will start the process of provisioning the Scomis User Name, creating the Hosted Applications account and linking it with SIMS.net. The Username and Password for the account are displayed on screen. When the account has been created, a new button will appear “Copy User Details to Clipboard”, use this button to copy the new account details, where you can either paste it into a Word document for printing or send via email. (please do not email password and user name together)
Manual User Request
When this tab is selected, the application will connect to SIMS.net and display a list of SIMS User Accounts that have not already been assigned a Scomis User Name. Once the list has populated, click on the person that you which to create an account for. If you have a lot of employees, at the bottom of the list, start typing characters from the person’s name into the “search for user” box, the list will then be filtered.
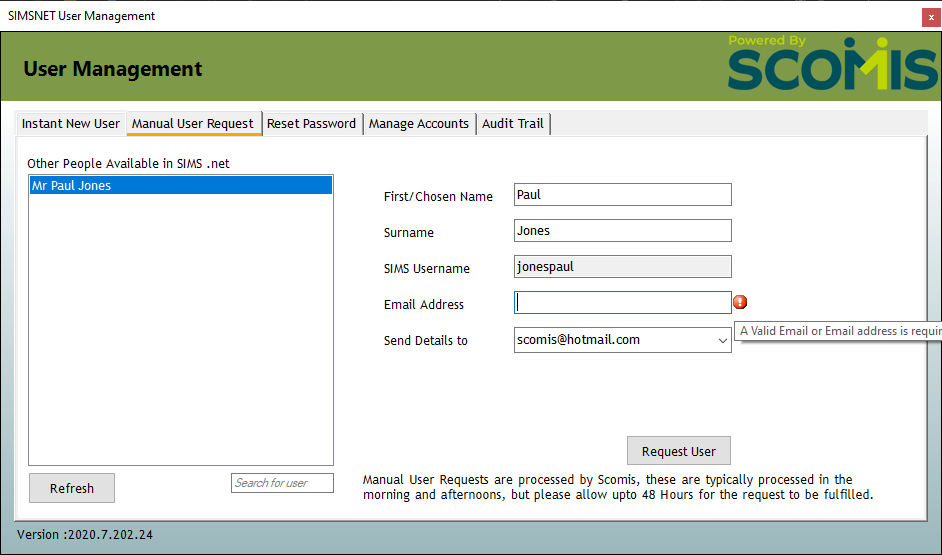
When you choose a person from the list, the details will be populated into the corresponding boxes, first name and surname. Check these details are correct before proceeding. If you are creating an account for a person called Francesca, but they prefer to be called Fran, then you must close the App and update the Preferred name fields in SIMS .net.
All Hosted Applications accounts must now have an email account associated with them, this can be any validly formatted email address and preferably an email address at the schools email domain.
From the “Send Details to”, choose the email address where the account details should be sent to.
To request the Account, click the “Request User” button. The application will record the request and remove the person from the list. The Username for the account is displayed on screen. The Request process requires additional validation by Scomis and can take up to 48 hours for accounts to be approved. If you have an urgent requirement for the user account to be approved, please contact Scomis in the first instance.
Reset Password
The Reset Password tool lists all of the accounts that belong to the school that you are logged into. Select the user from the list, or use the “Search for user” to find a user from the list. When you choose a user, their details will be populated into the corresponding boxes on the form. Update the user Email address if necessary, by typing the updated email and clicking the “Update Email” button.
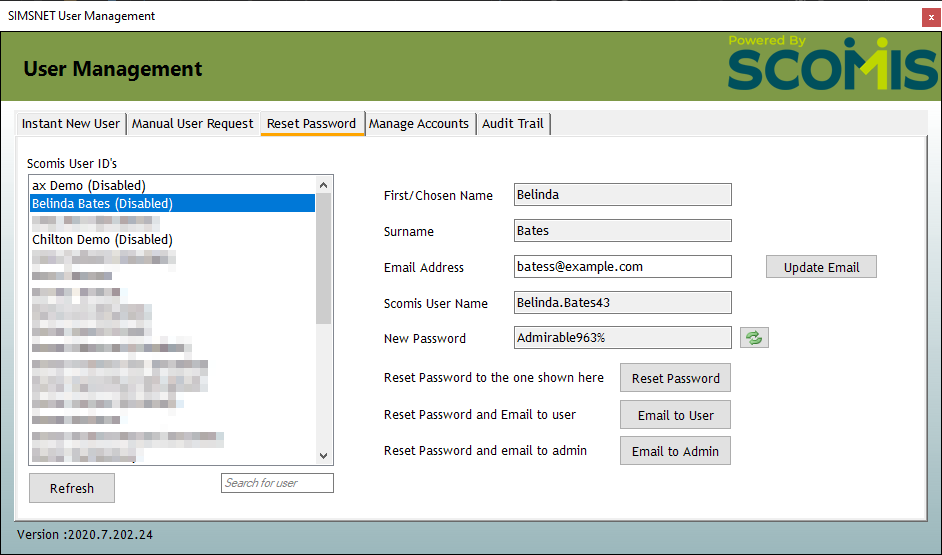
A new password is generated automatically and displayed on screen. You can use the green arrows button to generate a different password, if you are unhappy with the one that will be used.
There are 3 different options for setting the user password, choose only one!
- Reset Password: Resets the password to the one shown, no emails are sent.
- Email to User: Resets the user password to the one shown and then sends the same password to the user’s email address
- Email to Admin: Resets the user password to the one shown and then sends the same password via email to the School’s Hosted Apps administrator email address.
Manage Accounts
The Manage Accounts tool, lists all of the accounts that Scomis have a record of for the school that you are logged into. From here, you can choose a member of staff as well as searching for a matching record. Once a user has been selected, the corresponding boxes on the form are filled and the action buttons enabled.
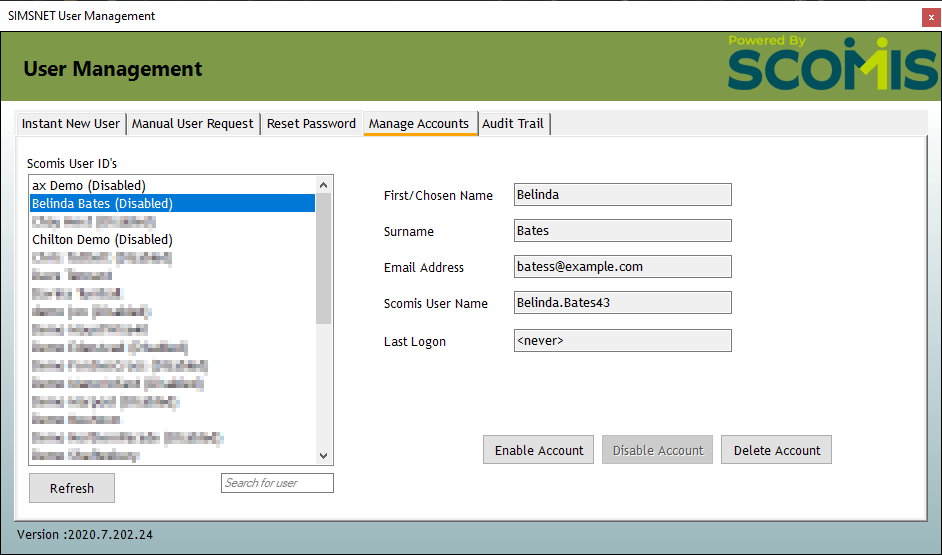
As with the Reset Password tool, you can update the user Email address. Be sure to click the “Save Changes” button to save the updated email.
There are 3 options available for each account.
- Enable Account – If an account has previously been disabled, you can re-enable the account.
- Disable Account – Use this option if you need to prevent an account from accessing the Hosted Applications Service. For example when an employee is on long term sick or other statutory reason.
- Delete Account – A member of staff has permanently left the school. The account will be placed into a “recycle bin” which will automatically be deleted after 6 months. Any user data associated with that user account with be deleted at that time.
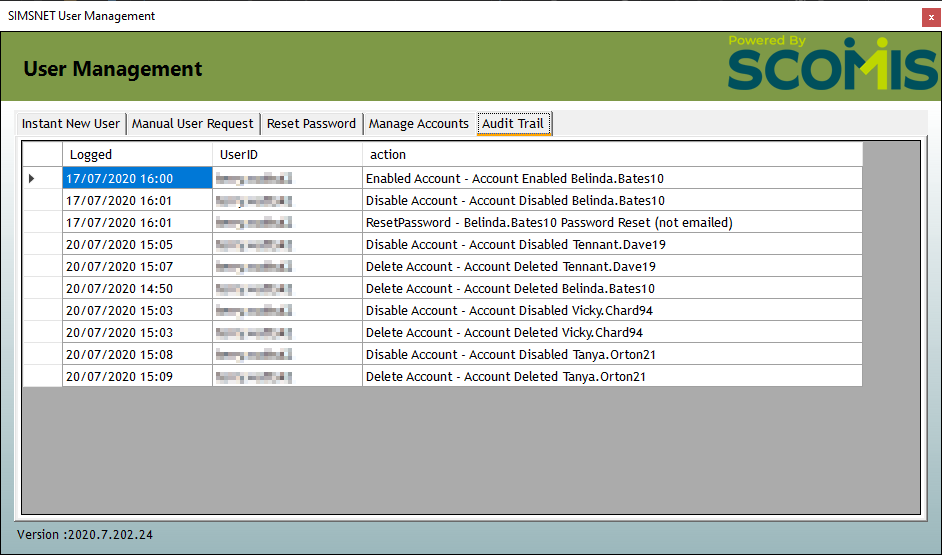
Audit Trail
The Audit Trail will show the last 50 account management actions along with details of who committed the change. Audit Data will be held for as long as relevant in accordance with the Scomis Data Retention policy.
Scomis Account Policy
At time of writing, accounts which are not active (have not been logged in, been disabled/enabled or had a password reset) will be disabled after 6 months. Accounts which have been disabled will be removed to the Recycle Bin 6 months after they have been disabled. Accounts in the Recycle Bin that have been there for 6 months will be deleted along with any user associated data.