Troubleshooting Scomis VPN (OpenVPN) External Connector
Schools who use Third party applications that integrate with SIMS .net have to use the Scomis VPN version of the External Connector. This solution uses OpenVPN to create a secure connection between the schools computer and the Scomis network. As OpenVPN runs as a high level System account, the new External Connector takes advantage of the extra security privileges and attempts to keep SIMS .net upgraded. However with the increased complexity of using the VPN tunnel, new troubleshooting routines will apply.
If the Installation is failing please read : http://faq.scomis.org/kb15925
For the External Connector Diagnostics tool see : http://faq.scomis.org/kb15928/
Other than using the diagnostics tool in C:/Support, you can check the following manually:
Checking SIMS .net
Most third party applications will use SIMS .net or parts of it to access the SIMS data, therefore check the following files and locations to ensure that the components required for SIMS .net are intact. The file paths below are for 64bit Windows.
- C:\Windows\SIMS.ini
- C:\Program Files (x86)\SIMS\SIMS .net\Connect.ini
- C:\Program Files (x86)\SIMS\SIMS .net\Pulsar.exe
The version of Pulsar.exe should match the most current version of SIMS .net i.e. 7.178
Checking Networking
OpenVPN uses standard networking protocols to securely send network data through a virtual network adapter, the network adapter then forwards the data to a software program which wraps up the data and sends it to the Scomis server where it is then unwrapped and sent to its destination. Standard network diagnostic tools can be used here.
IPCONFIG
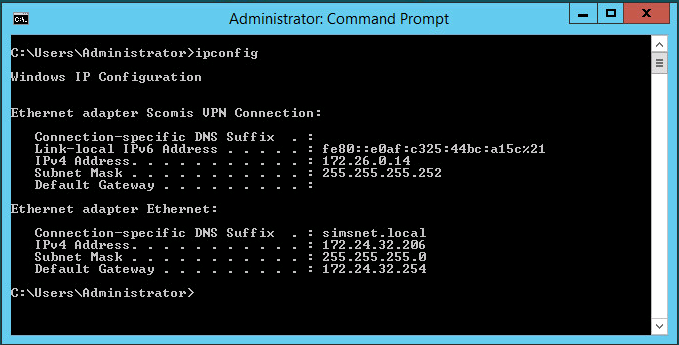
Open a command prompt and type IPCONFIG, this will list the network adapters of the computer and associated IP addresses.
If the OpenVPN connection is connected, you will see a network adapter with an address of 172.24.X.X. This is the IP address of your OpenVPN connection.
PING
You can now run the PING command to test the connection between your computer and the Scomis OpenVPN server.
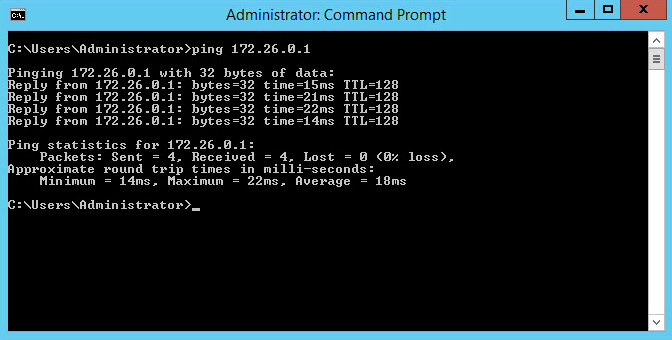
At a command prompt, type PING 172.26.0.1, if you get a screen similar to below then the connection is live and working.
Next try the PING command again, PING SIMSDB01, a similar result to the above screen shot should appear if the connection is active. If not, you may need to check C:\Windows\System32\Drivers\etc\Hosts to ensure that the Scomis hosts are present.
OpenVPN Service
If all of the above are working, then you will need to check the OpenVPN Service and related applications. OpenVPN is installed in C:\Program Files\OpenVPN, the Scomis configuration and utilities are installed in the config folder. Carry out the following sequence to ensure that OpenVPN is fully stopped.
- Open services.msc, locate the OpenVPN Service and Stop it.
- Open Task Manager, locate and kill
- AutoUpdate.exe (all instances)
- OpenVPN Daemon
- OpenVPNSERV
- (optional) Open the Network Connections and Disable and Re-enable the “Scomis OpenVPN Connection” adapter
Remove “AutoUpdate.exe”
- Locate AutoUpdate.exe in the C:\Program Files\OpenVPN\config folder
- Delete the file.
Check the OpenVPN Configuration file
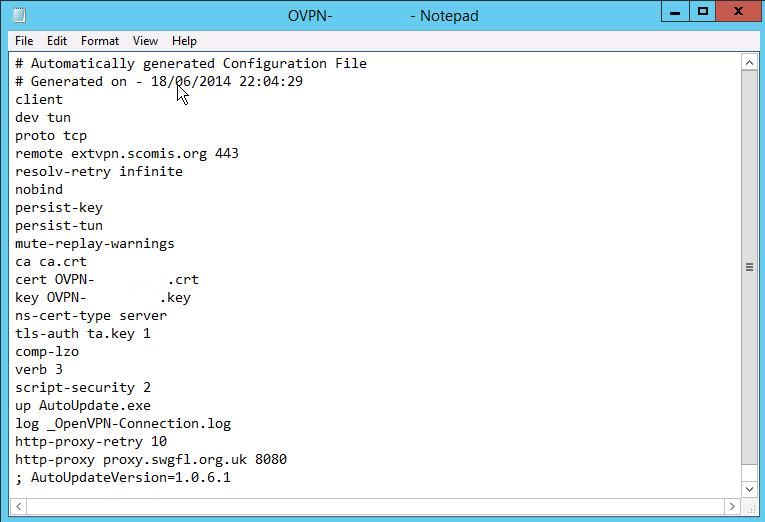
AutoUpdate should have be removed from the configuration file.
The OpenVPN Service and will look similar to below.
UPDATE – DELETE the “up AutoUpdate.exe” from the config file.
Note that if there are lines with “route-up”, these also need to be removed.
Start OpenVPN Service
- Open services.msc, locate the OpenVPN Service and Start it.
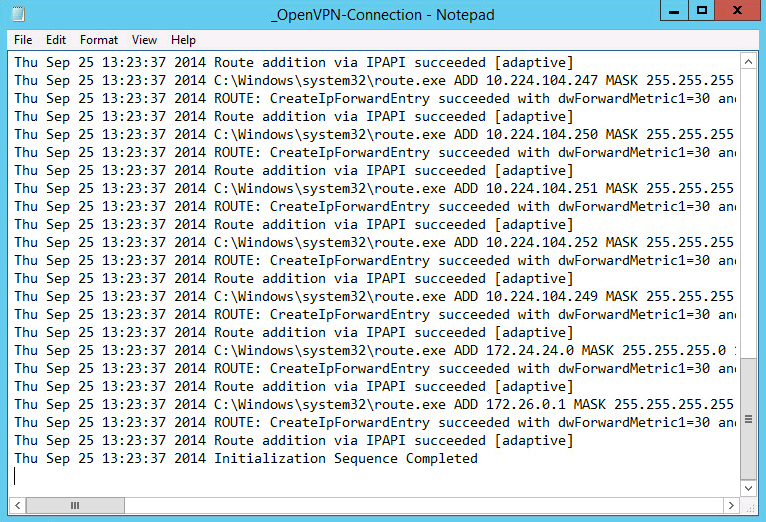
OpenVPN will read the configuration file and create a new log file in C:\Program Files\OpenVPN\config\_OpenVPN-Connection.log, the log file is overwritten each time the service is started. Ordinarily a connection will take around 30 seconds to initiate. The log file can be viewed with Notepad to inspect the current status of the connection.
There may be a number of errors displayed in the log file, this could be a result of the services not correctly stopping. These errors will correct themselves on the next restart of the service. A successful connection can be detected by the presence of “Initialization Sequence Completed” message as the last line of the log file.
Repeat the “Checking Network” section again to verify.


