How to configure your iPad to use a Proxy Server
Some networks require you to use a proxy server to access the Internet. A proxy server is another computer or device that acts as an intermediary between you and the Internet by relaying your requests to a server and the servers responses back to you. Unfortunately, this type of setup requires you to specify certain settings in order for you to use the Internet properly. This section will provide information on how to configure your iPad to use a proxy server.
1. Start the iPad
2. Tap on the Settings app. When the Settings app loads, you will be at the General Settings category.
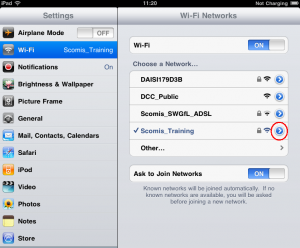
3. Tap on the Wi-Fi settings category and you will be at a screen as shown below.
You should now tap on the ![]() to access the specific settings of the wireless connection.
to access the specific settings of the wireless connection.
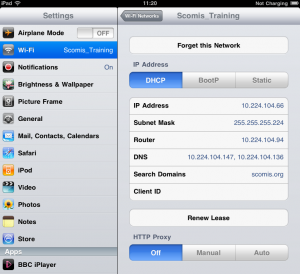
4. You will now be at the Wi-Fi network settings screen for the connected network
At the bottom you will find three proxy server options that you can choose from. The first option is Off, which is the default option and means that the iPad will not use a Proxy Server. The second setting is Manual, which means that you will enter the specific information about proxy server in the specified fields. The last option is Auto, which allows you to enter a URL that contains the configuration information as to what proxy settings the iPad should use.
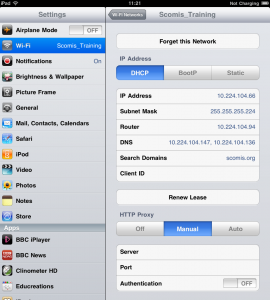
5: If you need to specify manual settings, then simply tap on the Manual button and fill in the appropriate fields as shown below.
If your proxy server requires you to login to it before it allows you to use it, make sure you slide Authentication to ON and input your login credentials.
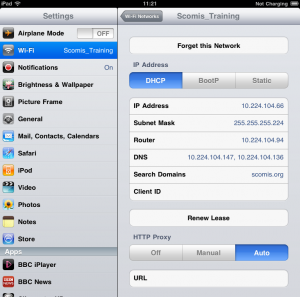
If you have a configuration URL that contains your proxy settings, then simply tap on the Auto button and you will see a screen similar to below.
6: When you are done setting up your proxy server, tap on the Wi-Fi Networks button and then go back to your Home screen to start using the iPad with these new settings.
Reviewed 17/08/2015


