Admitting Admission pupils
How do I make my admission pupils on-roll pupils
- Select Routines | Admission | Admit Applications to display the Find Intake Group
- Enter all or part of the intake group Name or select the appropriate options from the drop-down lists then click the Search button to display all intake groups that match the search criteria entered. Alternatively, click the Search button without entering or selecting search criteria to display all intake groups.
- Highlight the required intake group then click the Open button to display the Admit Applicant Detail
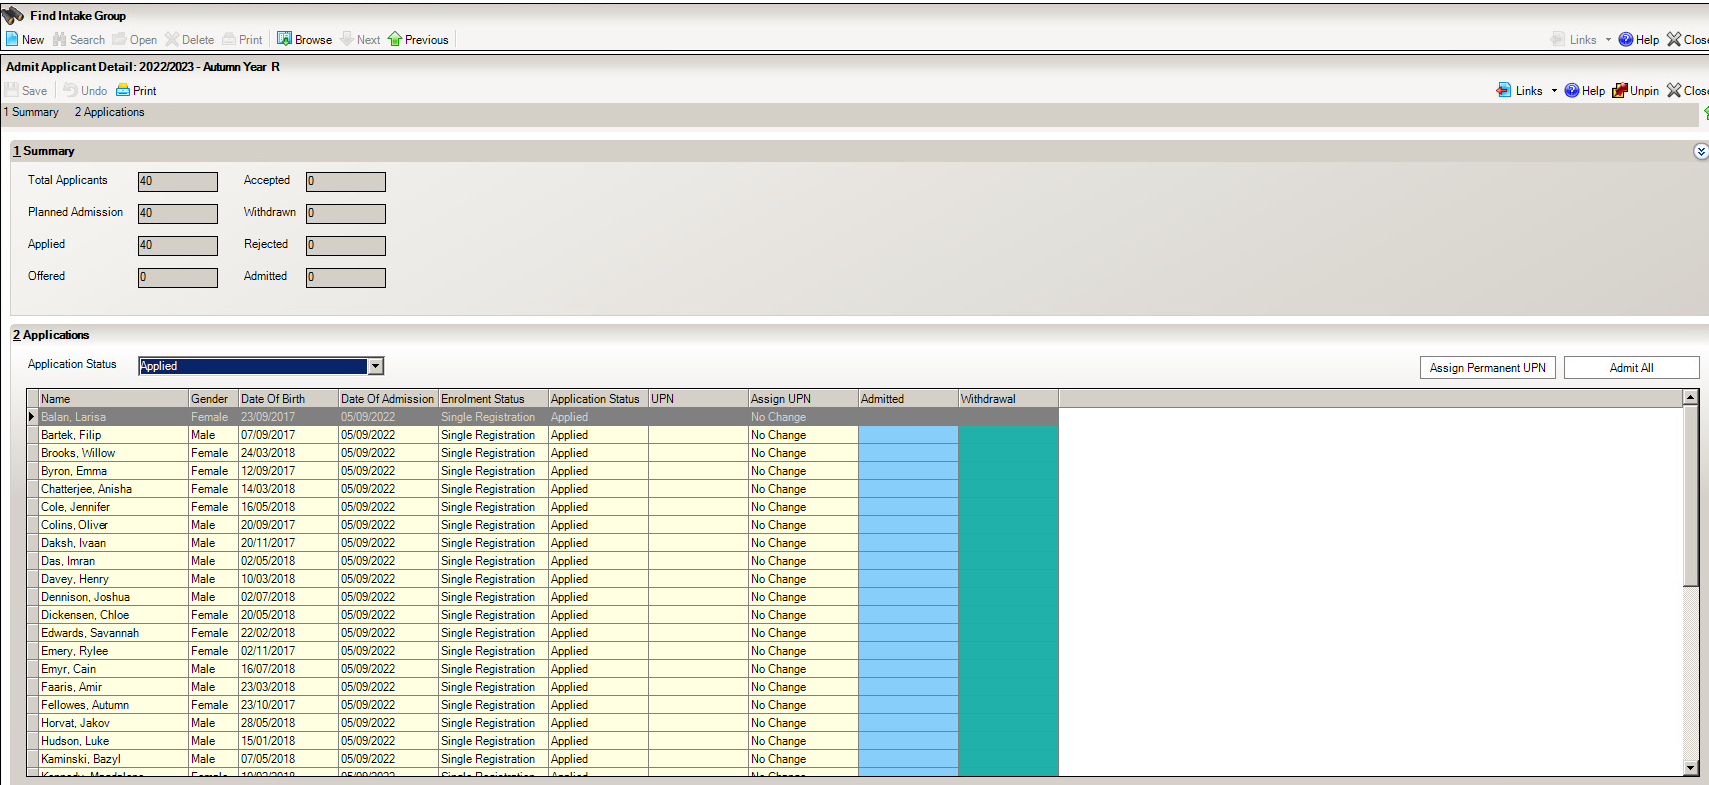
The Summary panel displays the current statistical information relating to the selected intake group.
- Total Applicants – indicates the number of applications that have already been received and provisionally assigned to this intake group.
- Planned Admission – indicates the original number of applications intended for this group (the PAN).
- Applied – indicates the number of applicants who have already applied for a place in this intake group.
- Offered – indicates the total number of places within this intake group that have already been offered to applicants.
- Accepted – indicates the number of applicants who have accepted their offered place.
- Withdrawn – indicates the number of applications that have been withdrawn from this intake group.
- Rejected – indicates the number of applicants who have been rejected from this intake group.
- Admitted – indicates the number of applicants who have already been admitted from this intake group.
Work through the list of applications, ticking each applicant appropriately by clicking the relevant cell. Clicking the Admit All button selects the Admitted cell for each applicant in the Applications grid.
The Assign UPN column can be edited. If an applicant does not have an existing UPN, click this cell, select the appropriate action from the drop-down list then click the Save button. Alternatively, click the Assign Permanent UPN button to assign UPNs to all the applicants in the grid. Permanent UPNs are issued to applicants only when it is believed that they have never been allocated a UPN, or to replace a temporary UPN.
Then click SAVE in the top right corner.
The pupils you have ticked as Admit will now show as On-roll Pupils.