Setup Process for SIMS Online Services (inc. Parent App)
This article details the four steps that are required to complete the on-boarding process for configuring SIMS Online Services.
Step One – Requesting Joining the SIMS Online Services
To request Parent App Lite please click here. You will be asked for the following information:
- The School’s Options contact
- School name
- School Post Code
- School LA Number
- School Four Digit DFE Number
- Technical Contact – this person will receive the activation code (please do not use Scomis as your technical contact, this should be either your network manager or Data Manager)
- Email address for Technical Contact
- Whether you already have a SIMS Online Services product (i.e. SIMS Activities, Parent App, Student App).
An email will then be sent to the Technical Contact by Capita which will contain a link that you will need to click on to begin the on-boarding process. The email will be sent to the Technical Contact from Capita SIMS via noreply@sims.co.uk. The invite email expires after 90 days. You will need to authorise an existing account from the options provided on the page. Once you have signed in, you will be prompted for your invite code, this should be pre-populated, if it’s not already entered you can copy the code from your email and enter it in the box. Once entered, click Register to create your administration account for the school. You will be logged in automatically as an Administrator and directed to the On-boarding Checklist.
NB If your school already has access to an online service i.e. Activities, Parent App or Student App, you are already on-boarded. You will not receive and activation code because on-boarding is a one-time process. Once Capita receive your school’s details they will simply activate access to Options, which will appear with your school’s other online services in SIMS Product Admin. You will only have to run the patches and set up Options users. Please allow up to two weeks to become activated.
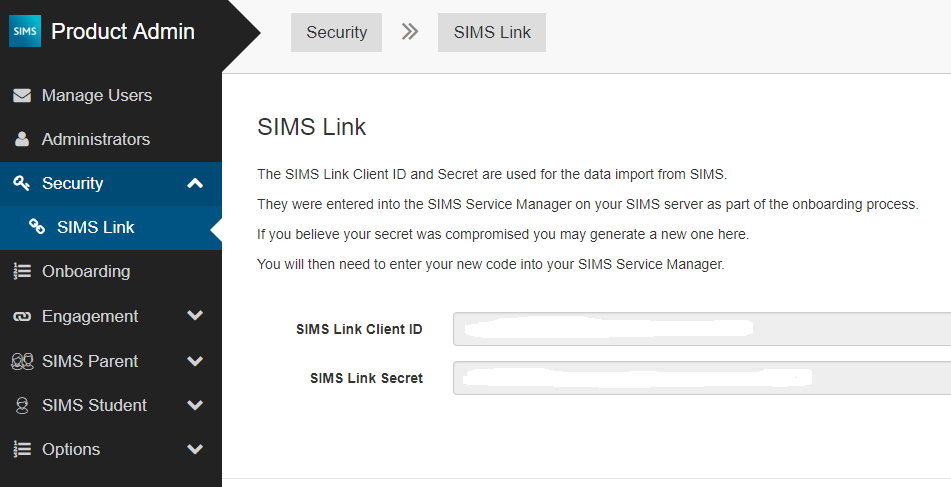
Step Two – Creating SIMS Link Client ID and Secret
In SIMS Product Admin click Security > SIMS Link and locate the SIMS Client Link ID and the SIMS Link Secret. Hosted Applications schools will need to email these through to scomis@devon.gov.uk so that your SIMS Service Manager can be configured.
Step Three – Adding Packages to SIMS Services Manager
This steps 1-6 applies for locally hosted schools only, see below. Scomis Hosted schools will need to log a call with the Scomis Service Desk to complete this step of the process. Please use the “Data Authorisation” tool to send us the SIMS Client Link ID and the SIMS Link Secret that you can find in Step Two. Once you’ve received confirmation that it has been completed you can skip to Step Five. Please see the following link for using the “Data Authorisation” tool for Scomis Hosted schools only – https://faq.scomis.org/kb25428/
You must connect your SIMS Online service to your main SIMS system by synchronising the SIMS Link Client ID and SIMS Link Secret codes in the school’s SIMS Services Manager. Locally Hosted schools will need to configure this onsite by following the steps below.
- Open SIMS Services Manager (Start > All Programs > SIMS Applications > SIMS Services Manager)
- Click Manage Packages to display the packages that have been created or are available to your school.
- Check the box by SIMS Online Services Client and click Install Selected.
- Click Home, you will be able to view the status of the package.
- Click the menu icon of the Actions column of the SIMS Online Services client package.
- Click Configure and enter the SIMS Client Link ID and the SIMS Link Secret. You can find these by following Step Two.
Once this has all been configured, your data transfer will take place. It can take up to an hour for the transfer to complete. You can manually trigger the transfer by restarting the service or by switching the package off and back on.
Step Four – Mapping your SIMS account
In your Product Admin site click Onboarding. You will see a list of SIMS users, highlight your name (i.e. that of the System Administrator or Data Manager) in the list of SIMS users and click the Map Administrator button. It is strongly recommended that more than one Administrator is chosen. The Onboarding Checklist will confirm that your setup is complete and it will recommend that you invite users.
For how to setup user accounts please click this link.