Redstor Remote Backup Part 3; File & folders Selections and Options
This document is intended to help complete the configuration of Redstor remote backup, by guiding you through the default backup selection process.
You should have installed the software using FAQ KB19763
You should have also created and configured the backup account using FAQ KB19769
Once the client software has finished the initial configuration, the Redstor client will open displaying a blank selection list
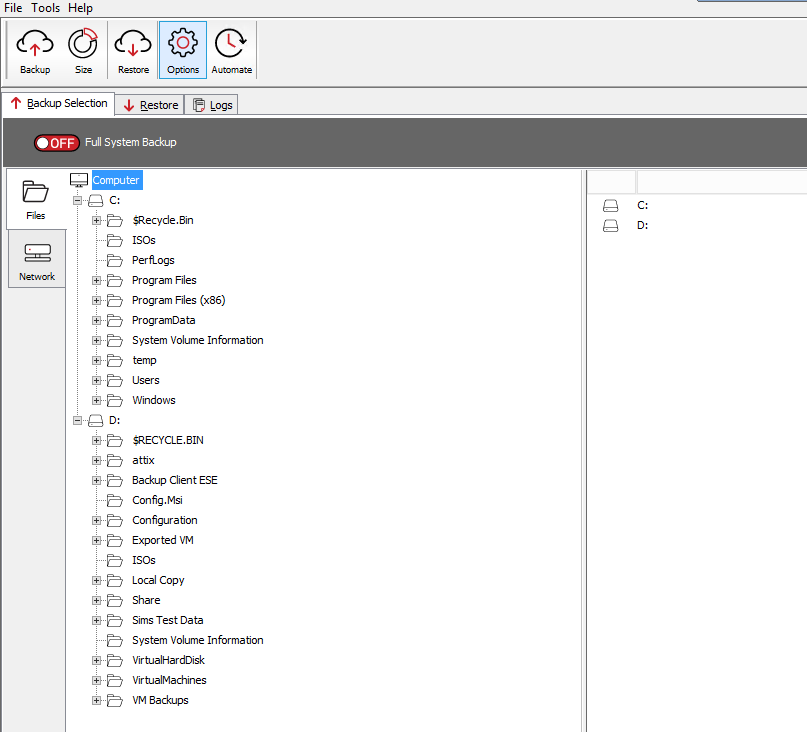
Download the Exclusion.xml file from the here and save it in to the Redstor folder, where you installed the client software.
This will then update the global exclusion option, with following folders (there is no need to restart the Redstor Service)
- Cookies
- $GRMTemp
- RECYCLE.Bin
- $Recycle.Bin
- Quarantine
- RECYCLER
- System Volume Information
- Temporary Internet Files
- urlcache
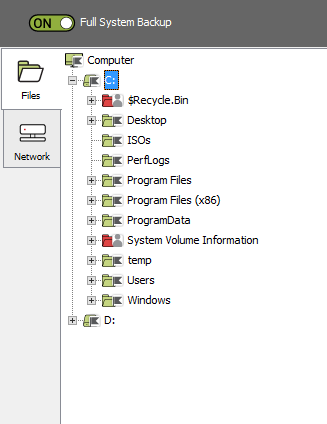
Then enable Full System Backup
SQL Databases
If you have installed the software on a device that has the SQL service running, the Redstor software will detect this and enable the SQL backup plugin.

The default setting after selecting the ‘Full System Backup’, is to backup all databases regardless of their online state.
The Redstor client will report errors on databases that are not ‘online’ when attempting to back them up.
To remove these errors and reduce the backup size (by not backing up, databases not in use). Simply right click on the database identified as ‘Offline’ and choose Exclude This will change the database from green to red, showing that it has been excluded.

Backup Size
With Full System Backup selected and exclusion file in place, press the Size button to get an initial backup estimate of the entire backup selection.
Note: This will not include any SQL or Exchange databases, even if the databases are selected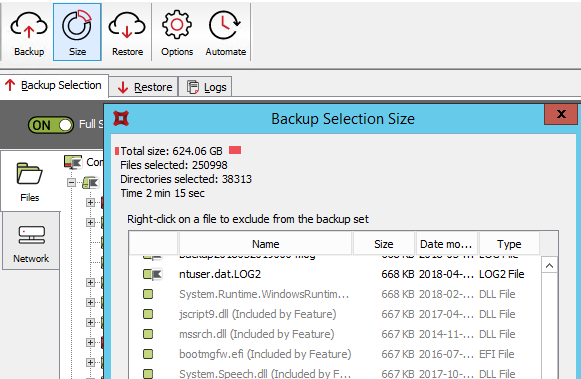
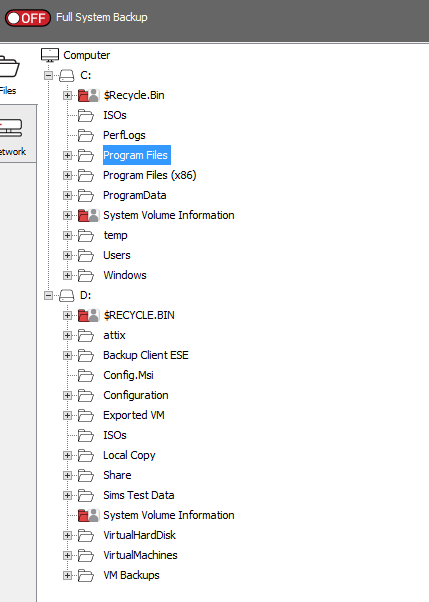
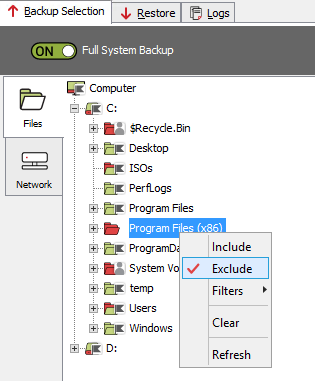
Excluding Files and Folders
The Scomis recommendation is to carry out a Full System Backup however, as the name suggests, that will back up the entire system which could cause the backup to exceed the subscribed account size limit and result in additional charges. To reduce the backup size there may be files and folders that are not critical and you do not wish to be included in the backup, in which case they can be excluded by simply browsing to the location of the file or folder, right clicking it and selecting Exclude. A file or folder that is excluded will be coloured red, if a folder is showing both red and green that indicates that either files or sub-folders within that folder have been excluded.
Note: If you select a folder for exclusion, all sub-folders and files below it will also be excluded from backup.
Take care when excluding files and folders. This is entirely at your own risk, excluded data will not be backed up so cannot be restored.
Final Settings and Checks
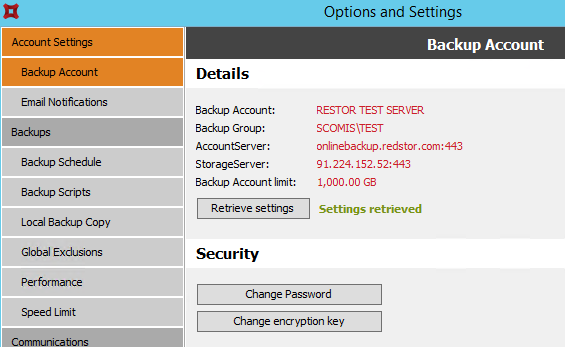
Click the Options button on the menu bar
The first screen will display your account details and where you can change the Account password and Encryption key (do not attempt to change either of these, unless you have been instructed to do so and have the original details)
Backup Schedule
From the menu on the left, click Backup Schedule
The default schedule is everyday at 19:00 but can be changed for whatever time is more suitable.

Speed Limit
As the initial backup will take a long time, it is recommended that you enforce a speed restriction. This will reduce any issue the backup traffic might cause by running through the working day.

In the above example, the school working hours has been configured with the red ‘Limit 1’ selection and the speed limit for ‘Limit 1’ has been set to 100KB/s. Before and after the red ‘working hours’ section the green ‘Limit 2’ blocks are set to 0 so the speed is unlimited outside of working hours.
Remote Access
In the left-hand menu, select Remote Access. To enable remote access to the backup client software (not remote access to the device itself) select the option Allow remote control of this Backup Client and in Type of access ensure Storage Platform controlled is selected.

This concludes the Backup Client installation and configuration process.