Redstor Remote Backup Part 2; Account Configuration.
This document will enable you to complete the installation and configuration of the Redstor backup client on your computer.
You should have already followed the instructions in FAQ KB19763 to install the Backup Client.
The Setup Wizard runs automatically the first time the Backup Client is opened. It comprises two components, the Account Wizard and the Backup Wizard.
- You can re-run the individual Account Wizard or Backup Wizard at any time by clicking:
Tools > Wizards > Account Wizard, or Tools > Wizards > Backup Wizard
Note: If you run the Account Wizard, a warning box will appear. Click the Run Account Wizard button and follow the instructions.
Before starting, ensure you have the following details
- Backup Group; from the console, ie; ‘APPLEDORE\MACHINES\APPLEDORE
- Account Create Key; from the console; right click the lowest level folder in the group,
- ‘CONFIGURE‘, ‘ADMIN’ the ACCOUNT CREATE key is displayed lower left
- Backup Account Password; is the default password that begins ‘len’
- Encryption Key; from the scomis password portal
Step 1: Specify Storage Platform settings
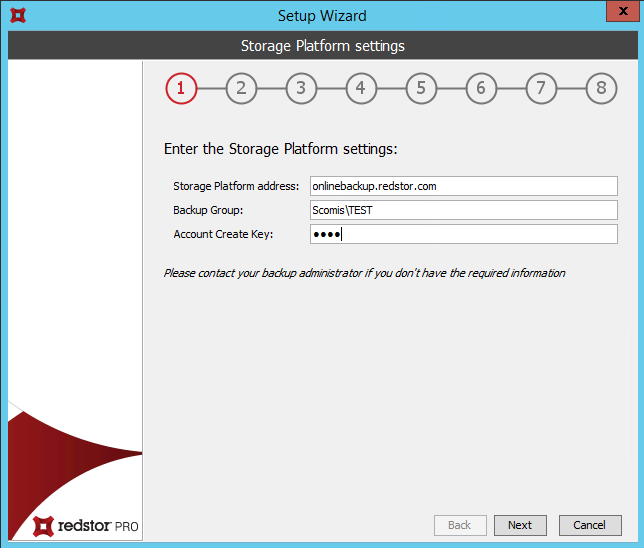
To specify the Storage Platform settings:
Storage Platform Address = onlinebackup.redstor.com
Backup Group = Specify the full path to your Backup Group ie, APPLEDORE\MACHINES\APPLEDORE
Account Create Key = ( This is the key that was set when the Backup Group was created, above)
Note: This key is case sensitive.
Once all the correct settings have been entered, click Next.
Step 2: Backup Account type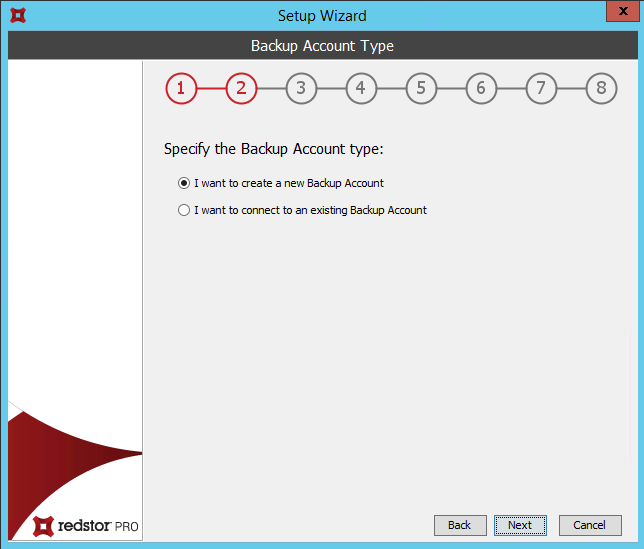
Create or connect to a Backup Account, this will depend on the type of installation.
‘Backup Account’ refers to the individual device being backed up, not the overall Redstor account. If you have multiple servers on site and they are all being backed up, they will each have their own Backup Account within the same Backup Group (specified in the previous step), ie SIMSSERVER, ADMIN SERVER, CURRIC SERVER
For a new installation, leave it as the default option of I want to create a new Backup Account
If you are re-installing after a rebuild or a technical issue and need to re-connect to an existing backup setup, select I want to connect to an existing backup account
Click Next to continue.
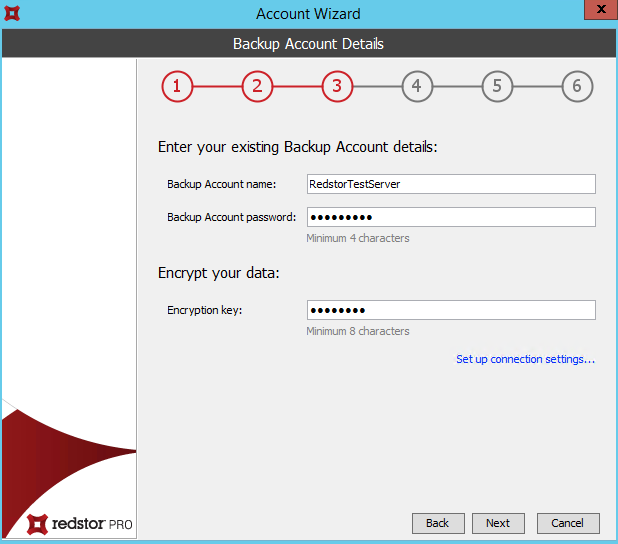
Step 3: Backup Account Details
Depending on the option you selected in the previous step, you will either be prompted to specify new backup account details or to supply the details of the existing backup account (to attach to an existing account, please see the Appendix at the end of this document).

In the Backup Account name box, type a name that describes the device (i.e. MainAdminServer)
In the Backup Account password box, type a password that consists of a minimum of 4 characters. Confirm it in the Confirm password box.
In the Encryption key box, type an encryption key that consists of a minimum of 8 characters. Confirm it in the Confirm key box.
Warning: Please make a careful note of your encryption key and store it in a safe place (e.g. in the school safe)
YOU WILL NOT BE ABLE TO RESTORE YOUR DATA WITHOUT IT
Click Next
Step 4: Backup Account Summary
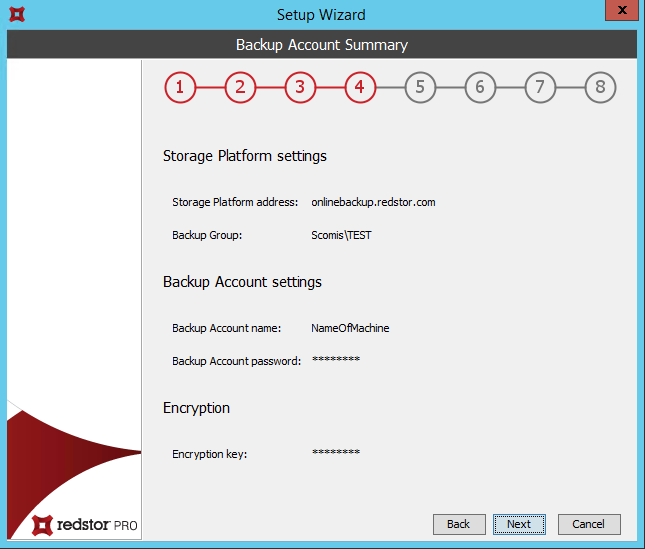
Confirm that the information you have supplied is correct, and then click Next.
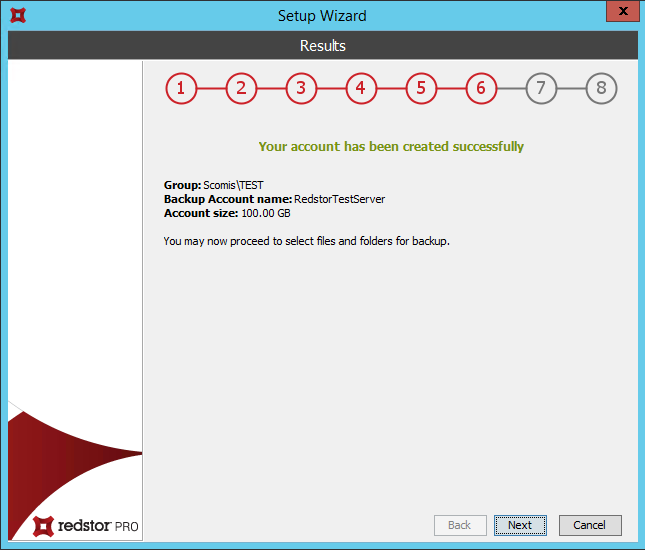
The Backup Client will connect to the AccountServer and configure your Backup Account. A message will be displayed confirming that your Backup Account has been successfully created.
This is the last step of the Account Wizard. After your Backup Account is successfully configured, the Setup Wizard will immediately start the Backup Wizard to help you configure your backup settings.
5: Backup Schedule
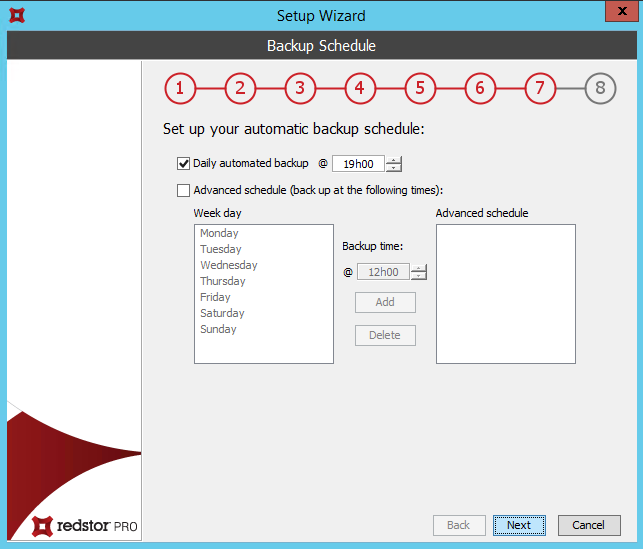
Backup Pro ESE Backup Client can take backups of included files and folders either upon request (manually) or automatically. This step enables you to set up an automatic backup schedule.
The server must be switched on at the time(s) specified for scheduled backups, but a Windows user does not need to be logged in.
Step 6: Summary
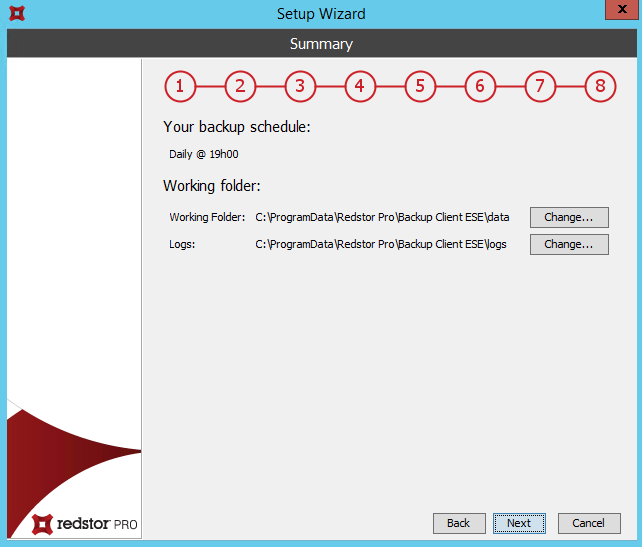
The wizard displays a summary of the choices you have made. It also shows the working folders which you can edit by clicking the Change button.
Note: If the drive on which the Backup Client is installed has limited space available, you should move the folders to another location.
Click Next.
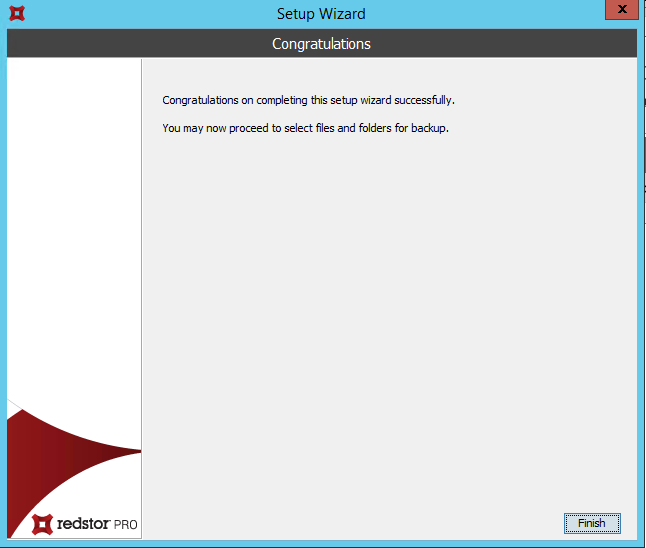
Click Finish and select data to back up.
See FAQ 19792 to configure the backup selection.
Appendix
Connecting to an existing Backup Account:
In the Backup Account name box, type the Backup Account name. This is the previous name of the device (can be obtained through Redstor console)
In the Backup Account password box, type the Account password.
In the Encryption key box, type the encryption key chosen when the Backup Account was created. (This cannot be reset and if not known you will have to create a new account)
Confirm that the information you have supplied is correct and click next.
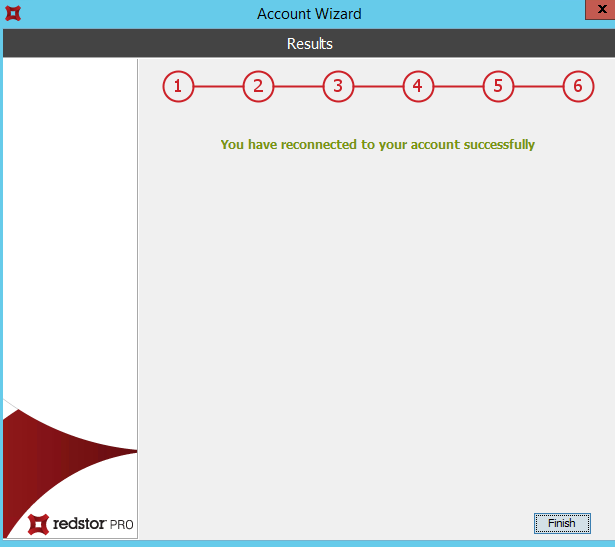
If you have entered the correct details, you will be presented with the success page.