How to restore files / folders from ScoMIS Remote Backup Service
From time to time, you may for whatever reason, need to restore a file which has been lost, deleted or changed. With the Scomis remote backup service, you can do this easily following these notes –
nb – You will not be able to perform a restore if the workstation or server is currently backing up.
1. Open the backup console
To do this, either:
(a) Right mouse click on the icon in the system tray pictured below.

(b) If the system tray icon is not showing, on an admin workstation or workstation server, go to Start, Program Files, Backup Professional, . This will open up the console.
If you are on a dedicated admin or curriculum server, you may not see the program installed in the C:\Program Files. Servers often have additional drive letters such as D, E, G, H drives, see below for example.

Browse the other drives and there should be a folder named “Backup ” in the root of one of the other drives. Within this folder, locate the SERunner.exe file and double click to run it. This will then open up the backup console. For example, on the server below, the folder was located on the E:\ drive. The SERunner.exe file is highlighted.

===========================================================
2. Locating the files or folders to be restored
Once you are in the console, select the “Restore” tab.
After a few moments, you will notice in the left hand pane, an expanded or expandable tree called “Last backup”. This will contain all the data of your last successful backup, ie last nights backup.
There will also be an expandable tree called “Previous Backups”.
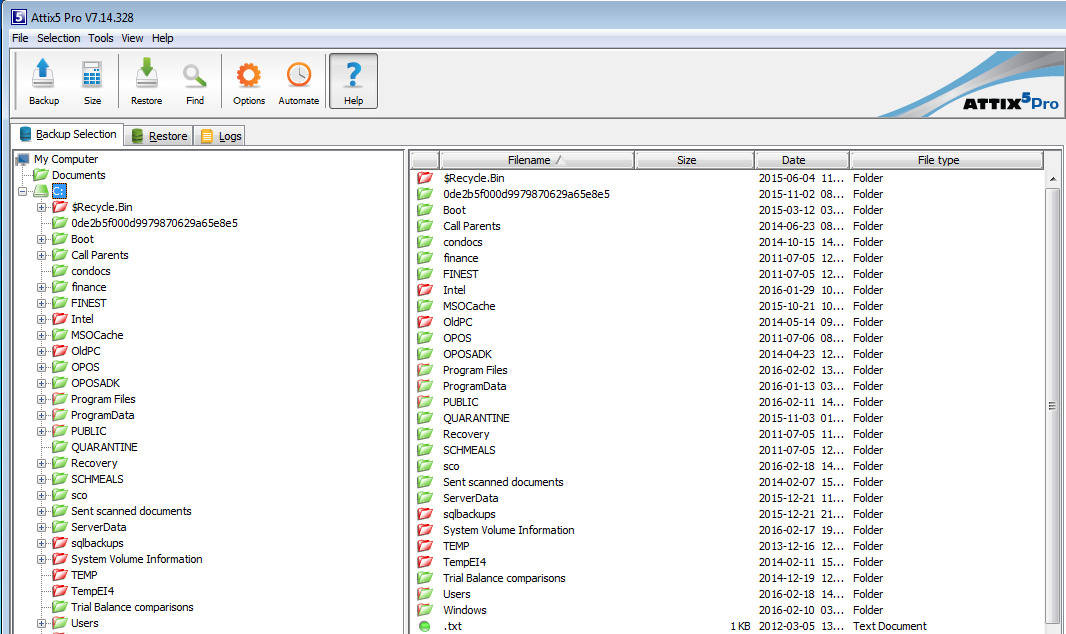
If you know you had the data in the last backup, expand the “Last Backup” tree, locate where the file or folder location was ie C:\Documents and Settings\User\…etc.
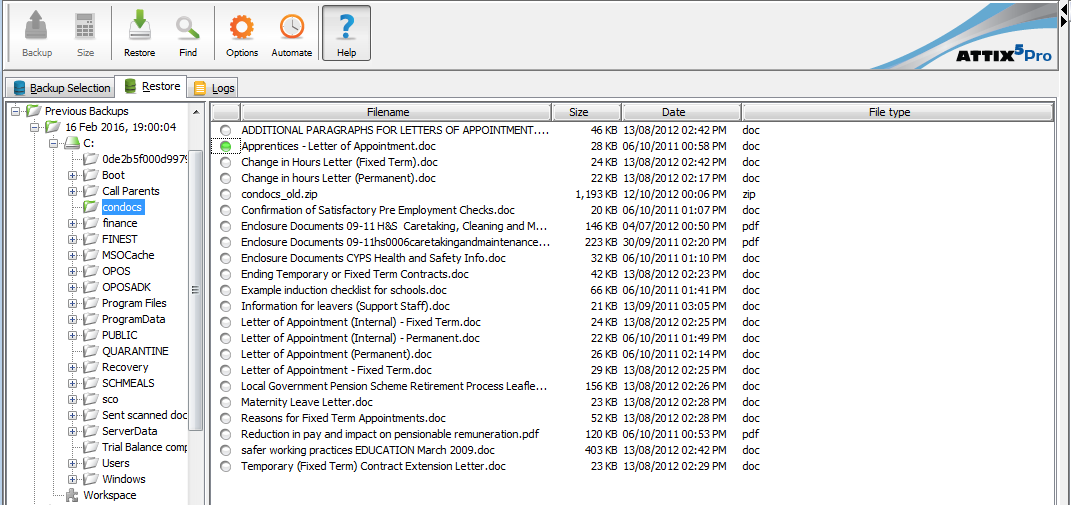
Or if you think the file or folder was lost or changed some time ago, you are able to browse the last 6 months* of backups to locate the file(s) you need to restore. To do this, expand the “Previous backups” tree, select the relevant date and then locate the data. Note that when you expand a date from the Previous Backups list, an archive directory needs to be received from the backup file server. This could take several minutes to receive depending on the speed of your Internet connection and the size of the archive file.

*Backups over a month old are rolled up into one month end. So you would normally see around 30-60 days of previous backups, and then 5 month end backups totalling 6 months of backups.
3. Restoring your data
Locate the file or folder you want to restore. Right mouse click and click on the “Select” option. The radio button to the left of the file or folder will then change colour from white to green. Once you have selected all the files / folders you want to restore. Click on the “Restore” button. This will then bring up a “File Restore Options” dialogue box.
4. File Restore options –
In the file restore options box, select how you want to restore the data. You can select a new location for the restored data, overwrite the existing data if applicable, and select whether you want to restore file / folder permissions. If you need assistance with this, please log a call with the Scomis Service Desk on 01392 385300.

After confirming your options, select Restore, and then wait for your workstation or server to download the restored data as shown in the screenshot below.
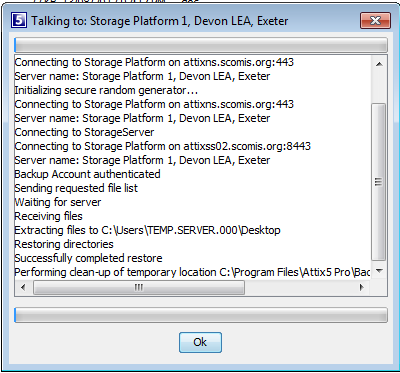
Once you get the message on screen that the data has been sent successfully, close the backup console and locate your restored data.
Reviewed on 12/02/2015